Category: Hardware

  • RixTalk Update

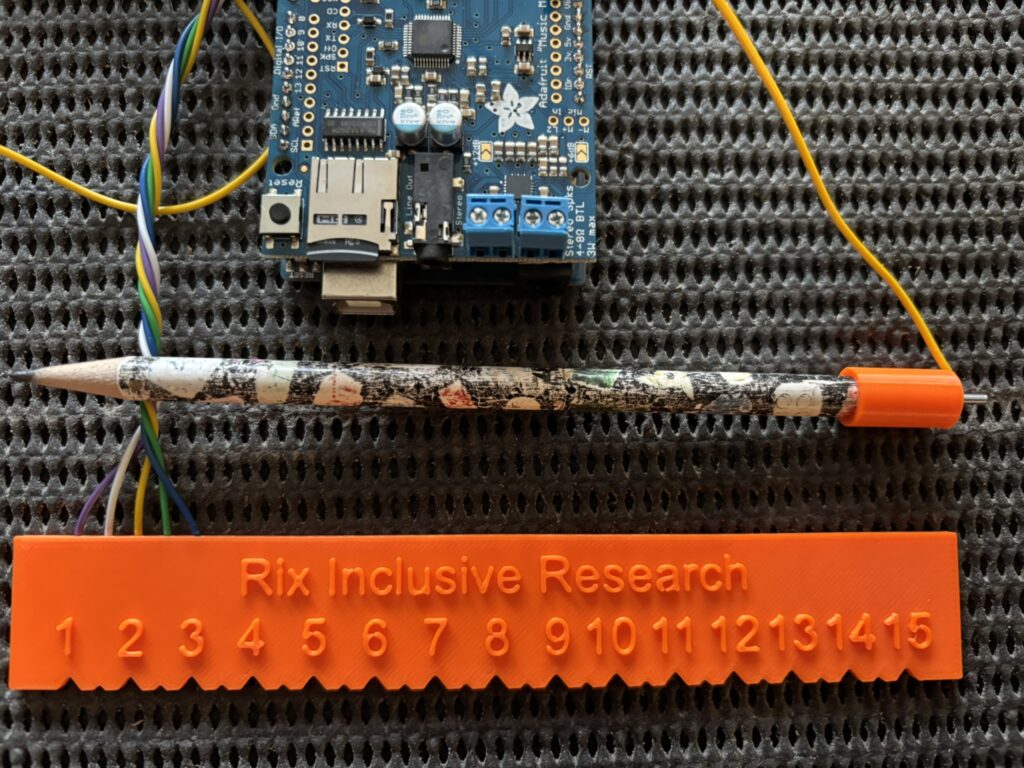
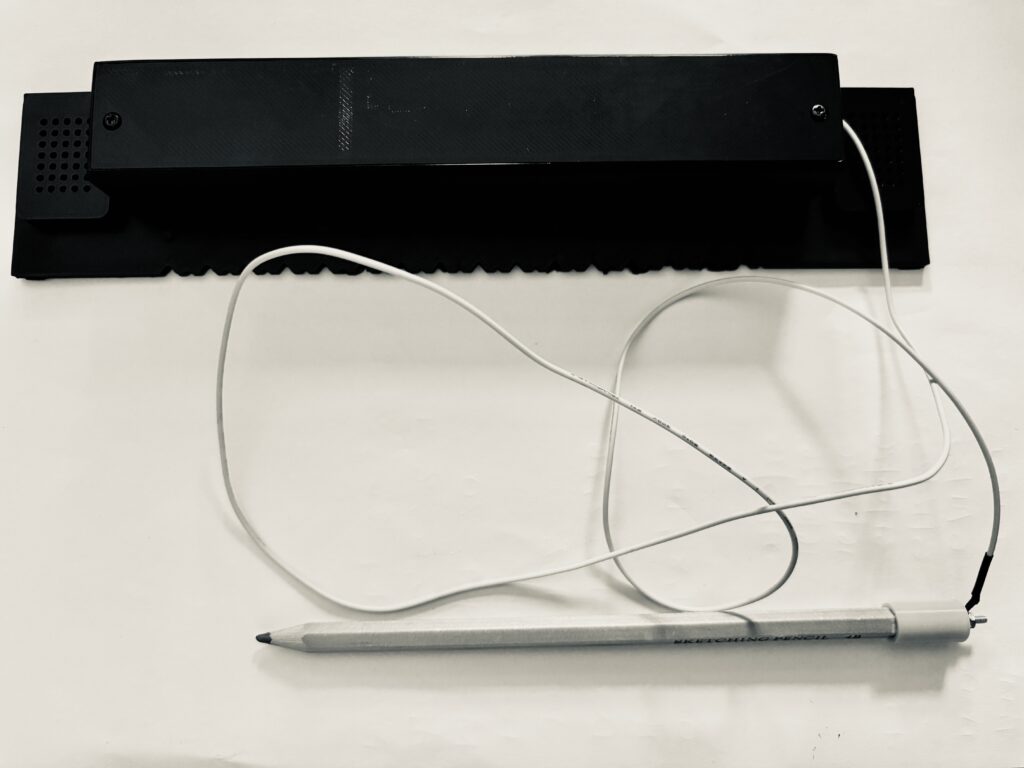
    The new version (technically the next iteration, as it is far from ‘finished’) of the talking ruler is almost ready. New parts have been printed, the stripboard has been soldered together and connectors added to the various parts.

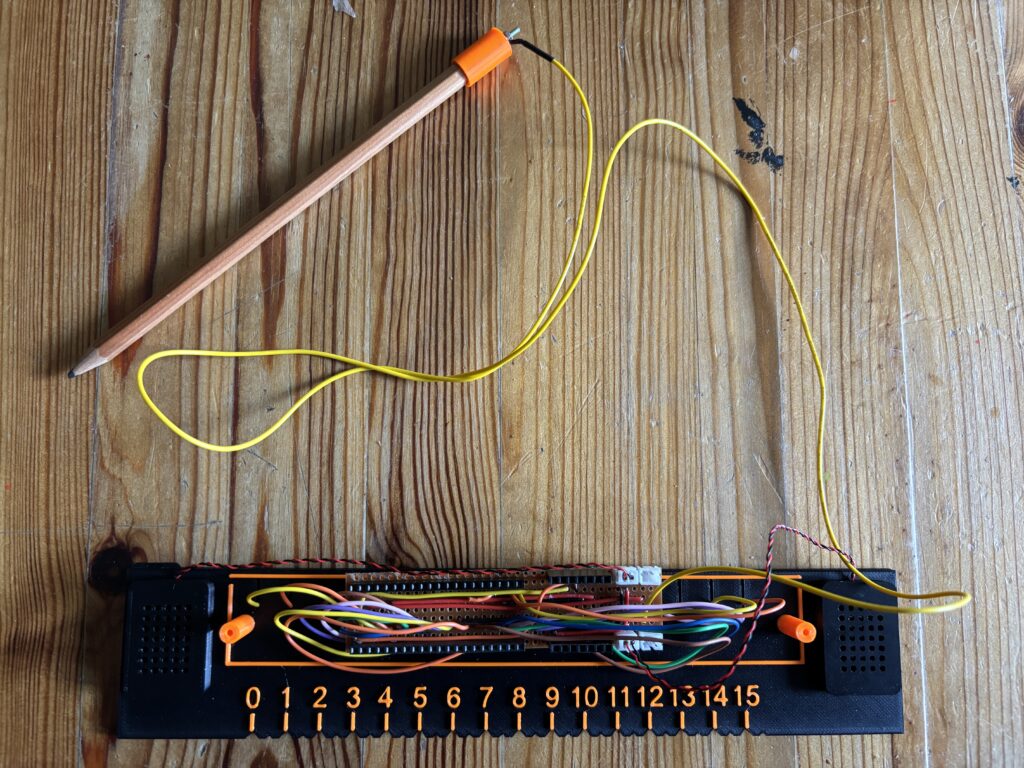
    As there needs to be a wire for each of the touch points on the ruler, which is every 10mm, then it required 16 different ports on the Pico, and therefore 16 single core wires soldered onto the board:

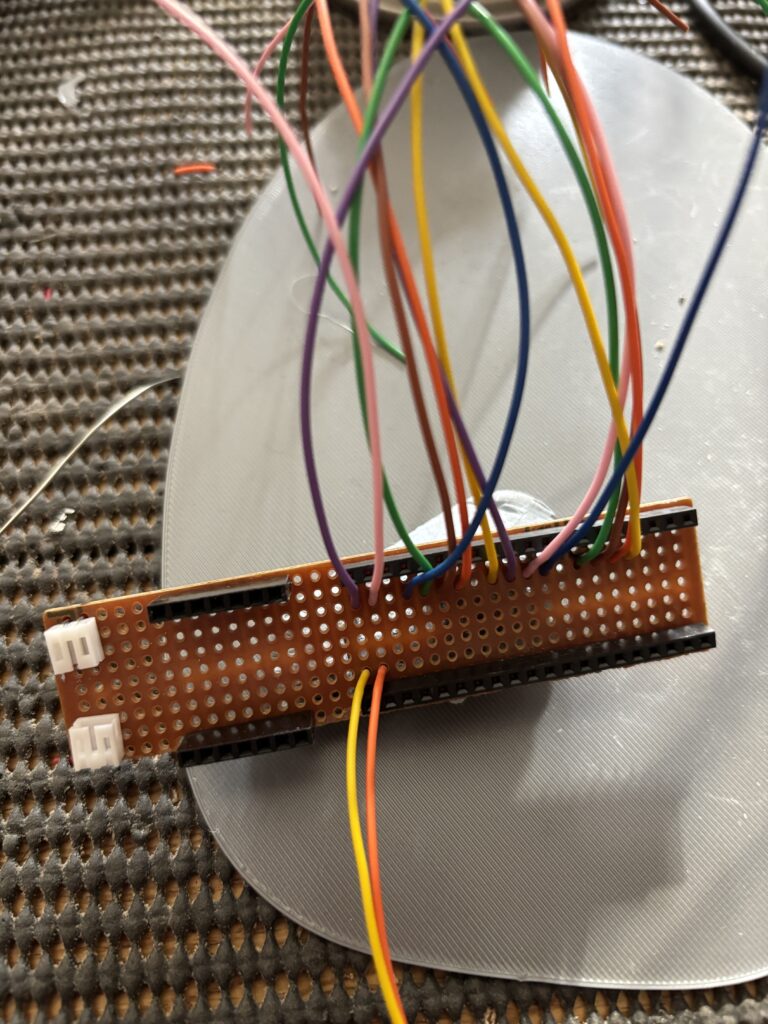
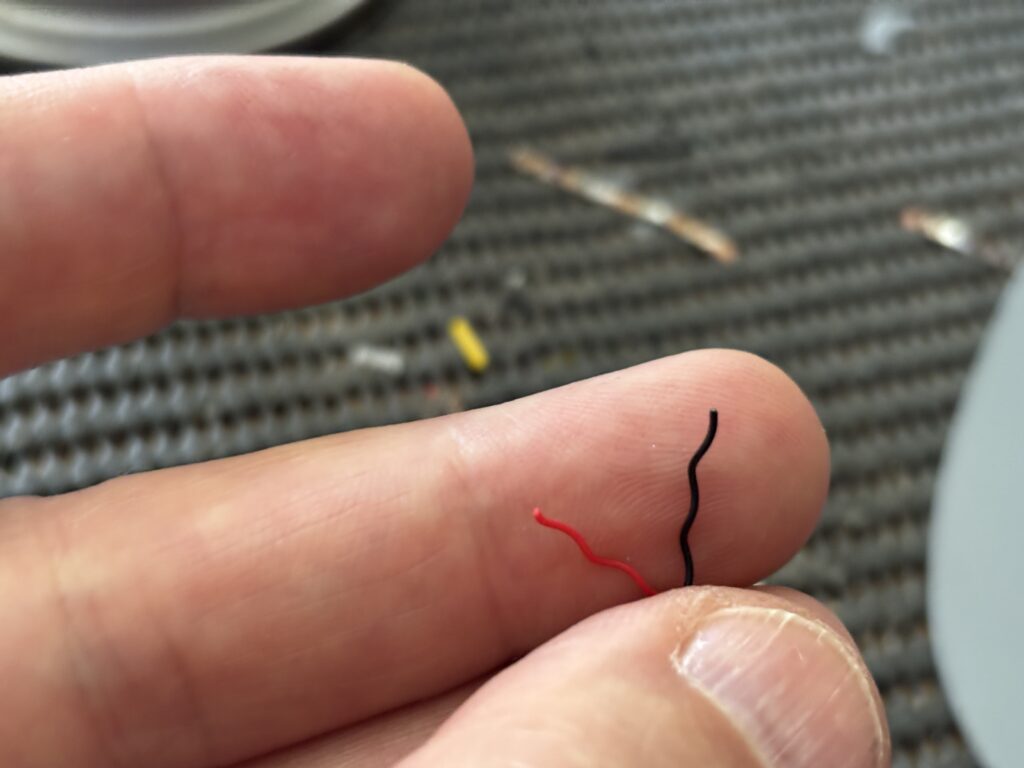
    I actually removed the two connectors at the end of the board and replaced them with ones which pointed upwards, as there was not enough space to insert both plugs. I also added connectors for the speakers. It was quite a challenge adding the plugs, as the speaker wires are only about as thick as a few human hairs:

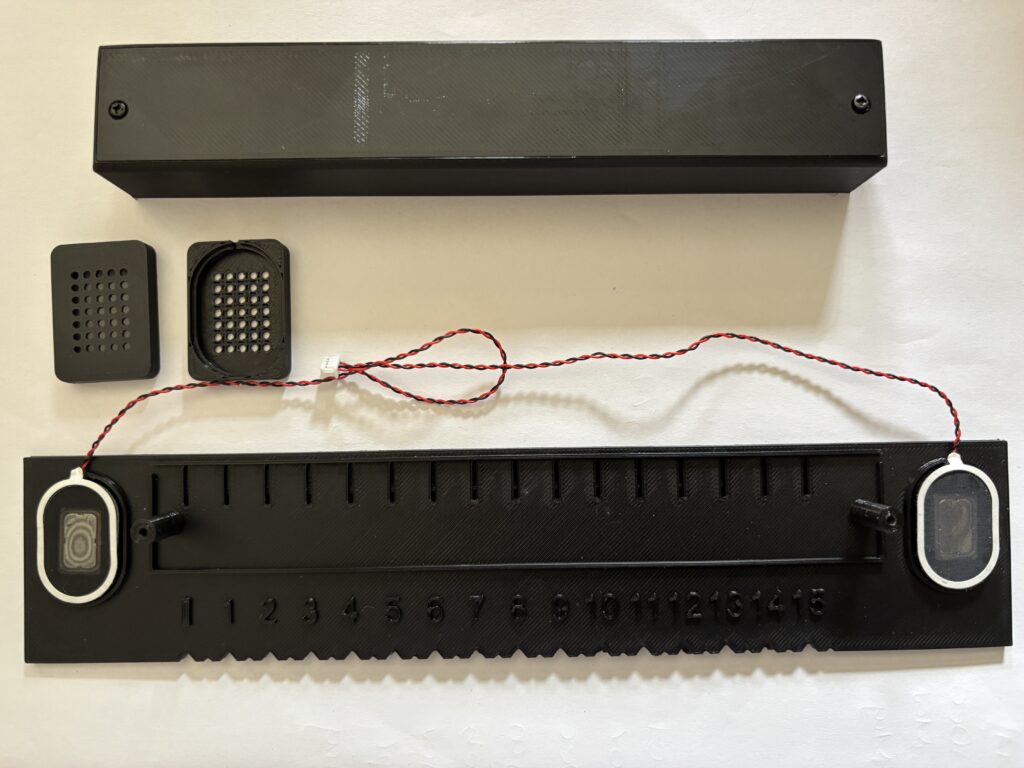
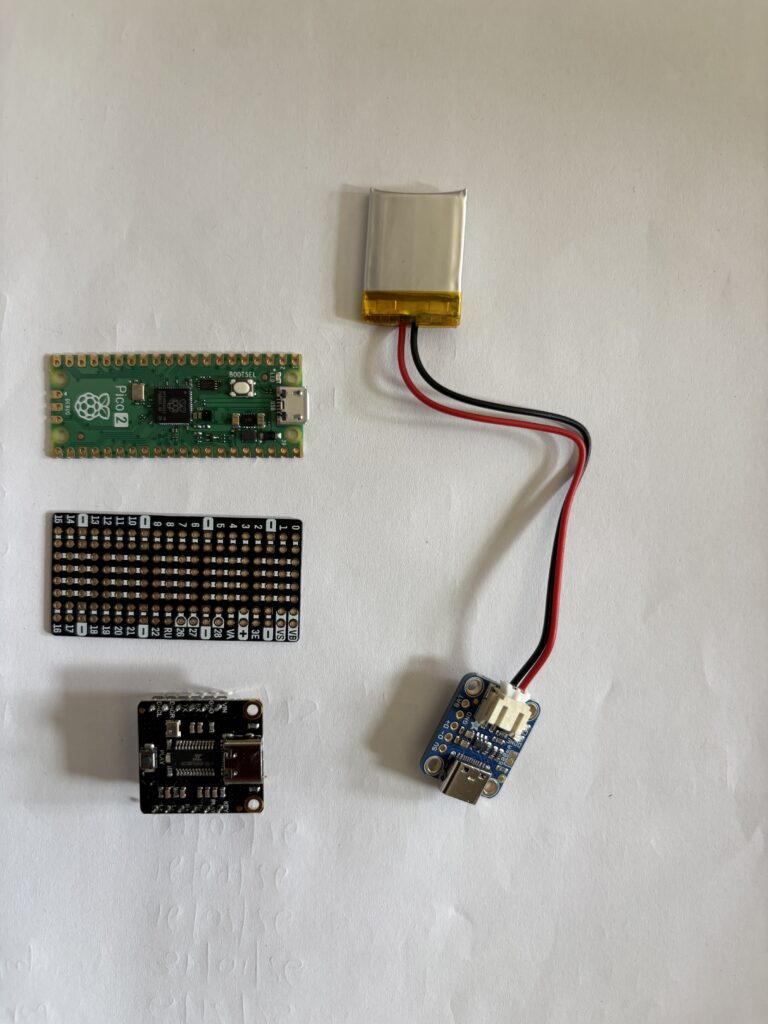
    I photographed the set of components that need to go inside the housing, which you can see will be a challenge to fit – an exercise in shoe-horning:

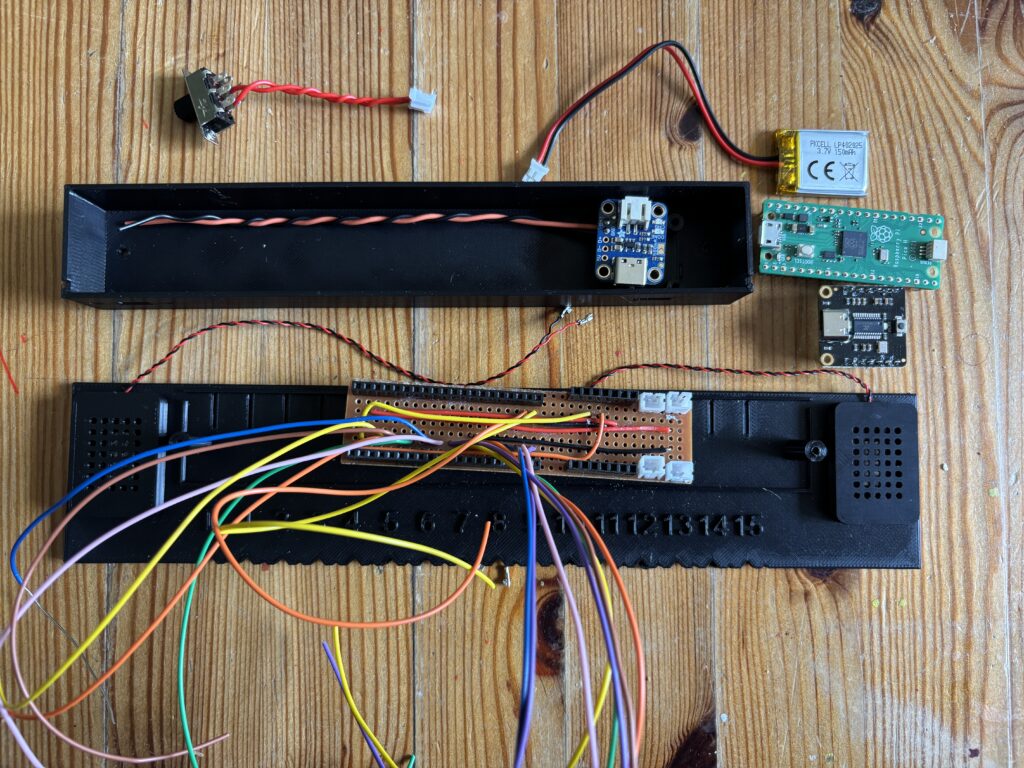
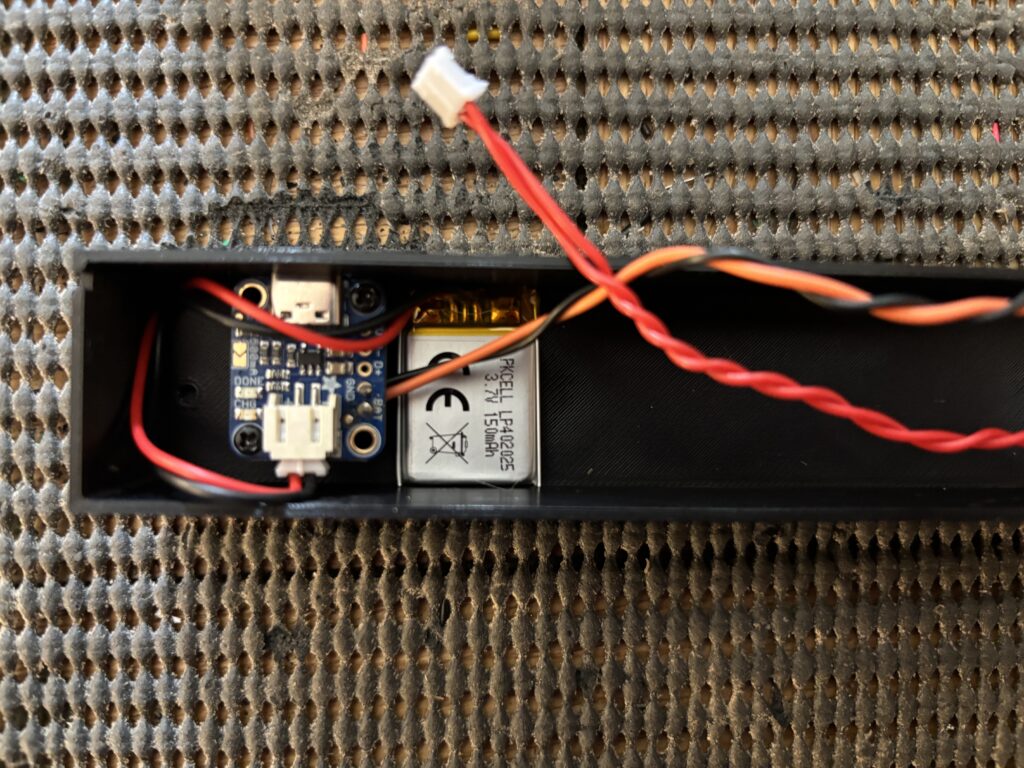
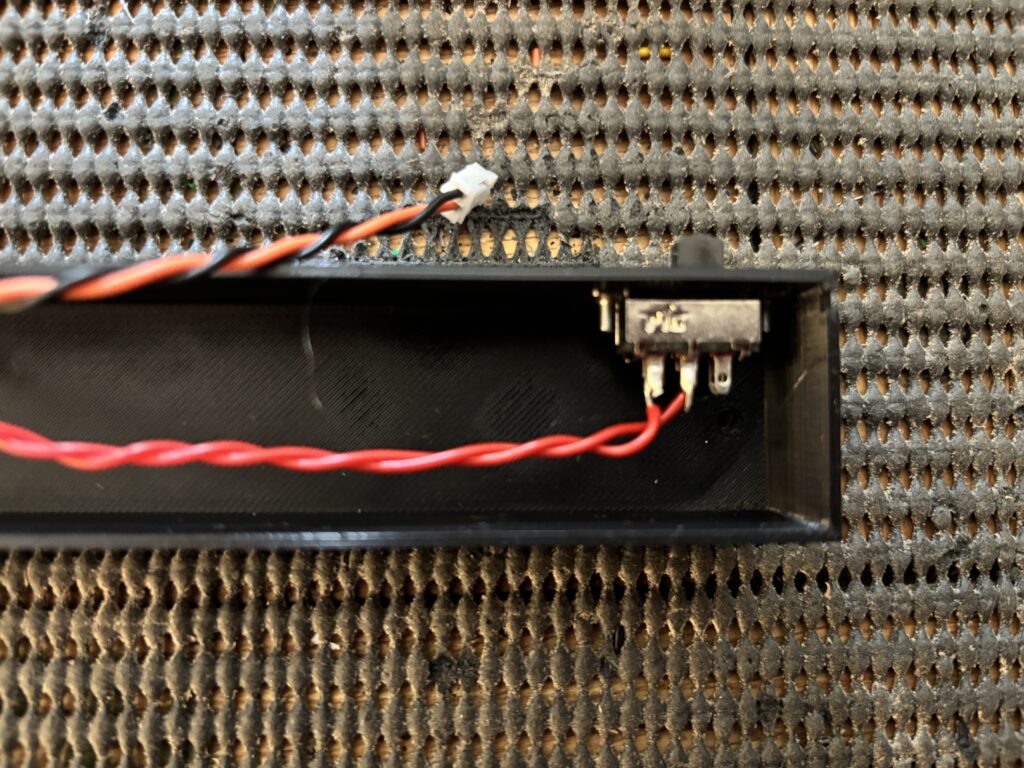
    The new battery and charger unit have been added to the housing, as well as the on-off switch:

    The on-off switch:

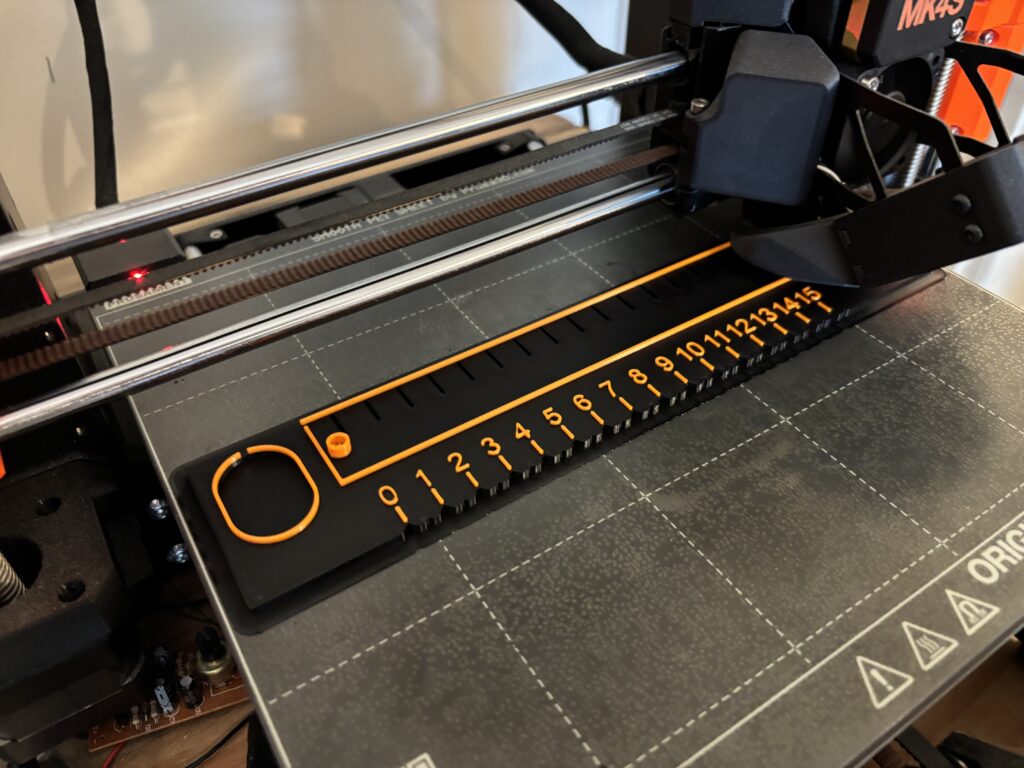
    Once the new housing has finished printing, it’s time for assembly and to see if it all fits together. Note that I chose multi colour filament to make the numbers stand out:

    The assembly of the talking ruler was a little tricky, given the number of wires and components that had to be crammed inside:

    The working version is shown below:

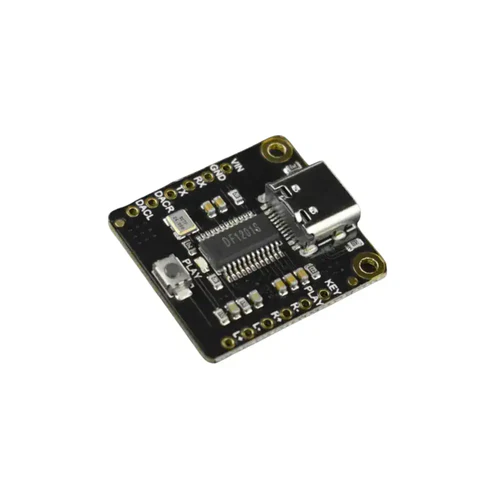
    You might have noticed that the playback sometimes repeats when holding the pencil onto the contact. This is a limitation of the software – the next version (if there is one) will use a different MP3 player module and be more controllable.

    The next thing to do is find a collection of suitable candidates to try the ruler out and see how well it works, get feedback on possible improvements and write up. If you’d like to participate, or know of someone with a sight impairment that would like to participate, then please do contact me. The user tests will be held in East London (at UEL) and also in Norfolk UK.

  • New RixTalk Talking Ruler

    After creating the initial prototype of the talking ruler and considering some of the early feedback given to me by people who have seen the device work, the new version is now on its way. This is now a self-contained unit that includes speakers, audio player, microcontroller and battery.

    The first version of the talking ruler worked quite effectively and produced a good clear sound, but suffered from having external wires, an external microcontroller and audio player:

    Old version of talking ruler.

    As the image above shows, the first version of RixTalk used an Arduino Uno R3 together with the brilliant Adafruit MP3 player shield (super audio quality). A standard HB pencil was wired to the Uno via a simple 3D printed cap, and the contact points on the ruler (that are touched by the pencil) are wired to the analog ports. It worked well, but was rather cumbersome with all the external wires and external microcontoller.

    The new version of RixTalk (let’s call it RixTalk2) is self-contained, with the speakers integrated into the ruler itself, and all electronics contained within a housing that is screwed to the ruler. The new version uses digital ports on the Pico, as there were not enough analog ports available. All of the components are 3D printed using a Prusa Mk4S.

    Note that the first notch on the ruler is a locater for 0 mm. The remaining notches are either large (every 10mm) or small (between each large notch). The large notches represent lengths at 10mm, 20mm, 30mm, etc., and play audio sounds for each one. The small notches are for lengths 5mm, 15mm, 25mm, etc., but do not play sounds.

    Plastic components of talking ruler together with speakers.

    Internally, the microcontroller is a standard Raspberry Pi Pico Mk2 (i.e. not wireless), the MP3 decoding and playback is taken care of by a Fermion MP3 module, using simple AT (ATtention) commands via one of the UARTs on the Pico:

    Fermion MP3 player module.

    The Fermion is connected to a pair of 2W speakers that are located at either end of the ruler, and is controlled directly by the Pico. Both Pico and MP3 player are powered using a single 3.7V 150 mAh LIPO battery that is connected to an Adafruit lipo charger module:

    Electronics inside talking ruler.

    The Pico and Fermion site side-by-side on a piece of stripboard (not the nice little Pi Hut board above – that was too small), which is used to connect everything together.

    The audio was generated using an AI text to speech engine, with an English sounding female voice. Each number was generated individually and stored as an MP3 file on the Fermion player.

    The image below shows the RixTalk talking ruler assembled, together with a 3B pencil. A 3B is being used as it gives better conductivity.

    RixTalk talking ruler with pencil attached.

    The talking ruler has yet to be tested out with end users, but that should not be too far ahead.

  • Speech Recognition Engine for Controlling RixBot

    Finally, I managed to find some spare time today to connect up the audio system to a Raspberry Pi 4, which includes a simple speaker output and MAX9814 condenser mic input module. The purpose of this setup is to allow the voice recognition software (VOSK) to be installed on the Raspberry Pi, and respond to simple prompts. It took a huge amount of tweaking (and a lot of head scratching, cups of tea and chocolate) to finally resolve all the conflicts, but it seems to work, and the great thing about it is that it works offline.

    The screenshot below shows a simple test that illustrates the software responding to voice prompts after I spoke several simple commands into the microphone:

    I was impressed that the mic module would pick up on commands from 2 metres away, and did not make any mistakes.

    The next stage of this work will be to attach the motor controller to the Raspberry Pi and install the whole module into the RixBot body. The body of the RixBot is based upon a RealRobots ‘Cybot’ body, which was originally sold as a kit through a weekly publication (see below). This is an excellent basis for a robot, as it already has geared motors, battery compartments and places for light and ultrasonic snesors built into it.

    Once the Raspberry Pi has been mounted inside the robot body, and the motor controller installed, then it is ready for testing at Rix with our co-researchers.

  • Simple sound recording chip – LCTech

    Another device has been tested for the project, LCTech’s ISD1820-powered ‘voice module’.

    LCTech Voice Module

    This is a fairly small board centred around a single-chip recording and playback solution. From a little googling, it was found that the chips can be purchased for about £0.56 a piece.

    The downside of them is that by default, they can only record up to 10 seconds of audio, and the quality is awful. They record at 6.4KHz, which is far below the Nyquist frequency for human-audible sound of about 44Khz (see CD-quality audio for examples).

    This can be adjusted up to 20 seconds of audio (at an even lower sampling rate of 3.2KHz), or down to 8 seconds of audio, at 8Khz.

    The quality is not helped by the microphone being equally cheap and soldered directly to the board – it’s very hard to get it close enough to the sounds you want to capture.

    Despite this, the interface to the chips is very well-suited to the project- they run off 3V sources, like 2 AA batteries, or most LiPo cells, and all of their functions are controlled by simple IO pins. There’s no user interface, and all responses are immediate.

    This lends itself well to having a simple ‘hold to record’ function, and ‘pull to playback’. The chip will even cut off playback halfway through if you press record, and write over the sound!

    The other downside is that there’s no way of digitally copying the recorded sounds from the chip, as with the MP3 player, or any of the devices using SD cards. This means there’s no way of saving, editing, or otherwise altering the sounds via computer.

    Although the chips can only record a single sound at a time, they’re so cheap and simple it may be worth creating a ‘master’ device which controls multiple chips, and adding some pre- and post-processing to the audio, like a preamp stage for the microphone, and an amplifier for the speaker to increase the volume and fidelity.

    Redesigning the board the ISD1820 comes on could allow multiple devices to fit into one case.
    Redesigning the board the ISD1820 comes on could allow multiple devices to fit into one case.

    It also conveniently fits into the test case, even on its original board!

    Prototype image #1

    Craig developing collection module
    Craig developing collection module

  • Devices to be modified

    Some of the devices under consideration.
    Some of the devices under consideration.

    We are looking for devices which could be easily modified into our prototype soundbox at the moment.

    The device has to be capable of both recording and playing back a small selection of sounds. It has to be portable, and operate with as few controls as possible.

    Previous work in this area used dictaphones, which are quite expensive, but provide very good sound quality. They don’t generally have a playback function, as they are intended to be connected to a computer for download and editing. This is a step which we would like to avoid with our device.

    There are a multitude of cheap MP3 players on the market at the moment which are able to record and play back in a few formats, such as .WAV or .MP3. One of these has been disassembled for study:

    2013-07-02 14.50.11

    It runs (or ran, rather- the battery leads snapped off during testing) on a small lithium-polymer battery, and is controlled through a small LCD screen by five pushbuttons on the front. It has a 3.5mm jack for headphones, and a mini-USB socket which can be connected to a computer to modify the contents of its memory, and to recharge the battery.

    It is small enough to be easily inserted into a handheld case, and is definitely capable of recording multiple short audio clips onto its 4GB of flash memory.
    However, the user interface needs a fair bit of navigating and some unintuitive button presses. There’s also a long delay when switching from playback or record to the main menu. Even if we were to replace the buttons with control by an Arduino, the delay would probably cause issues during use.
    The MP3 player, despite having a ‘record’ function, did not actually have a microphone. Soldering one onto the PCB solved this.
    Sound quality is fairly poor, with a lot of noise and a continual beeping.

    2013-07-04 15.05.02 2013-07-04 15.00.14
    We have also considered making a video capture device, and have done some similar tests on this “Trevi VideoMemo Recorder”. It is very simple to operate, and can record up to three different videos. It can be switched from recording to playback quite quickly, and does not have a complex GUI.

    There’s no way of extracting the data from its memory, as the device does not have a USB or other data socket. It also runs on AA batteries, or any other source of 3V DC. It’s also considerably larger than the MP3 player.
    During testing, it was found that the VideoMemo has what looks like a slot for a mini-SD card silkscreened onto its PCB (circled in the image to the right), but there’s no socket attached by default- this could provide extra storage space or a way of extracting recorded sound and videos if one was attached.
    Some other possible devices to be looked at include the circuits used in greeting cards, MP3 shields for Arduino microcontrollers, and stand-alone barebones MP3 player circuits.