
Work has been ongoing for a new version of the RixBot throughout December, mostly looking for ways of improving the accuracy of the movement and different ways to program the robot buggy. The first update involved changing the types of motor used to drive the buggy from simple DC motors (not very accurate) to stepper motors, mainly because of the accuracy when using steppers. I already had a pair of Nema 17 stepper motors from a former project, and an old buggy chassis made from acrylic.

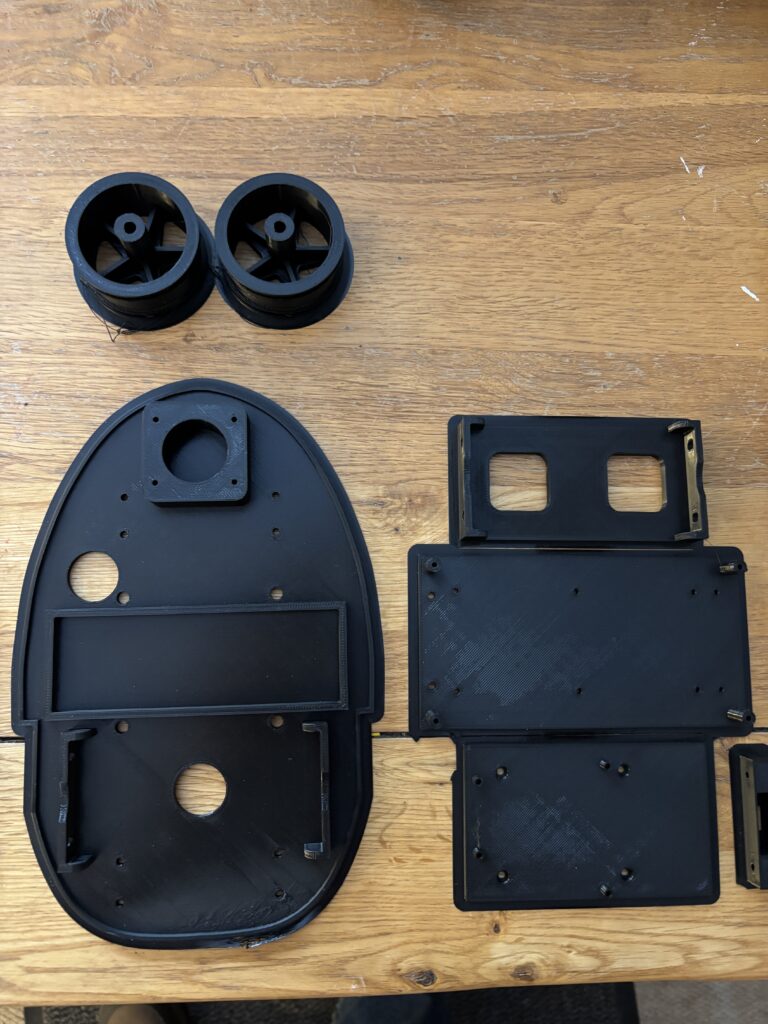
Unfortunately, the wheels supplied with the acrylic buggy did not fit onto the stepper motors, so a new pair that would fit onto the ‘D’ shaped shafts were 3D printed:
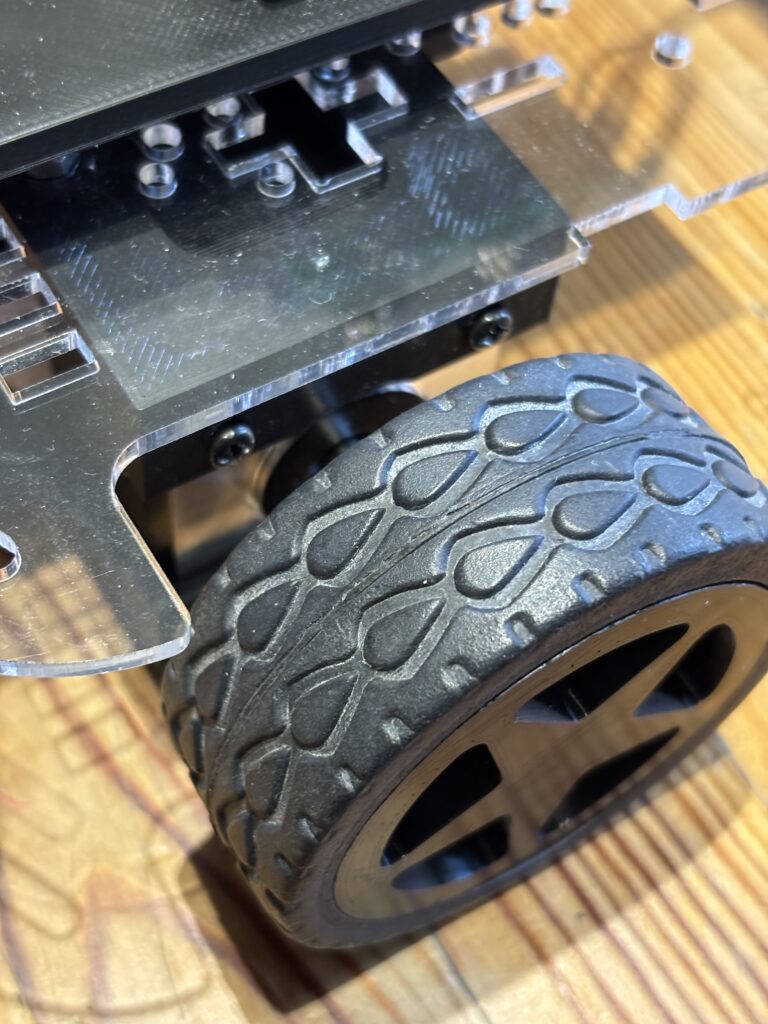
The tyres off the old wheels were reused and placed onto the new 3D printed rims, as you can see above.
To drive the stepper motors, a pair of TMC2208 stepper drivers were used as they are much quieter than the alternatives (such as A4988s) and work really well:
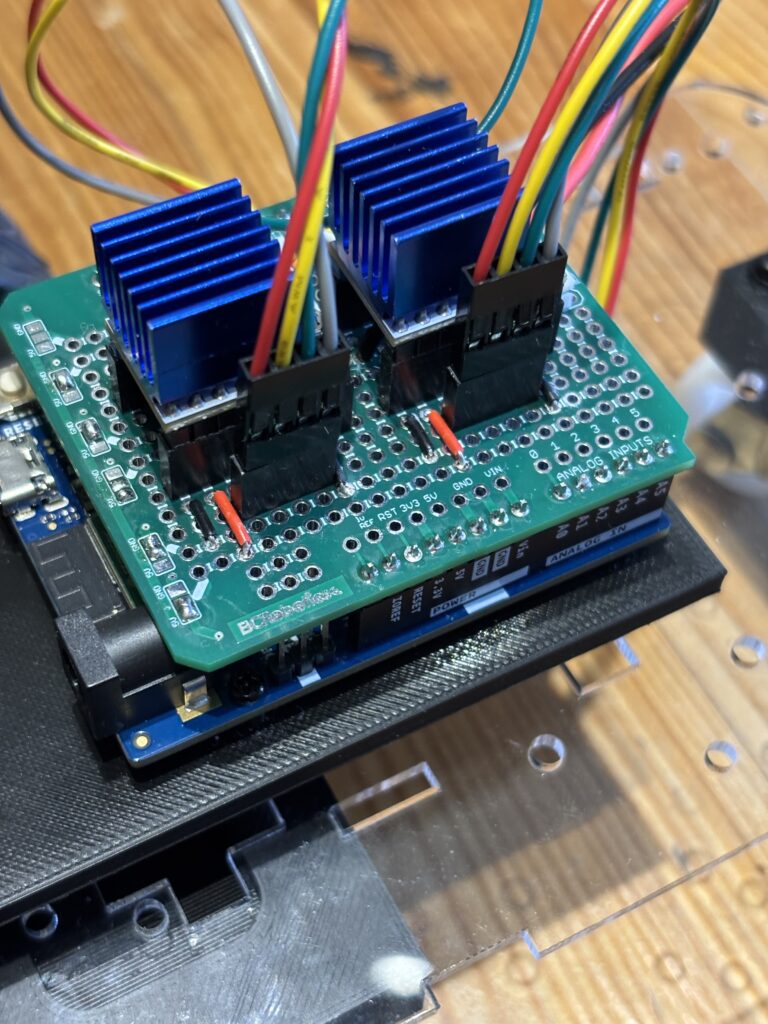
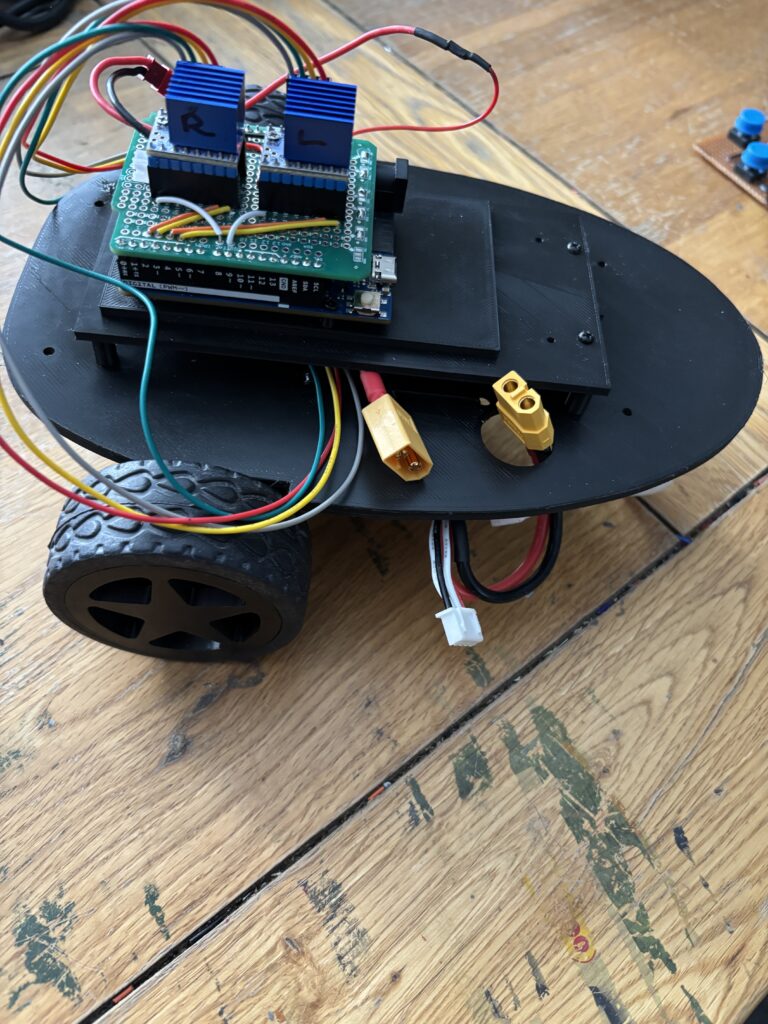
The whole buggy is controlled through one of the new generation Arduino Uno R4 wifi microcontrollers, which has built-in bluetooth low energy. The stepper controller were mounted on a custom shield for the arduino (see above) that was constructed from a simple prototyping board. This particular board is made by BC Robotics, and an excellent prototyping shield for the uno. Unfortunately, they are a bit difficult to get hold of at the moment, so I am developing one of my own,
To power the stepper motors, an 11.1V Lipo battery was strapped to the underside using zip ties, and the arduino itself was (for the time being) powered using a std 9V battery (but later to be powered by the same Lipo battery).
The controller used on the previous version of the has been retained, and allow you to create a sequence of commands to send to the buggy via simple button presses:
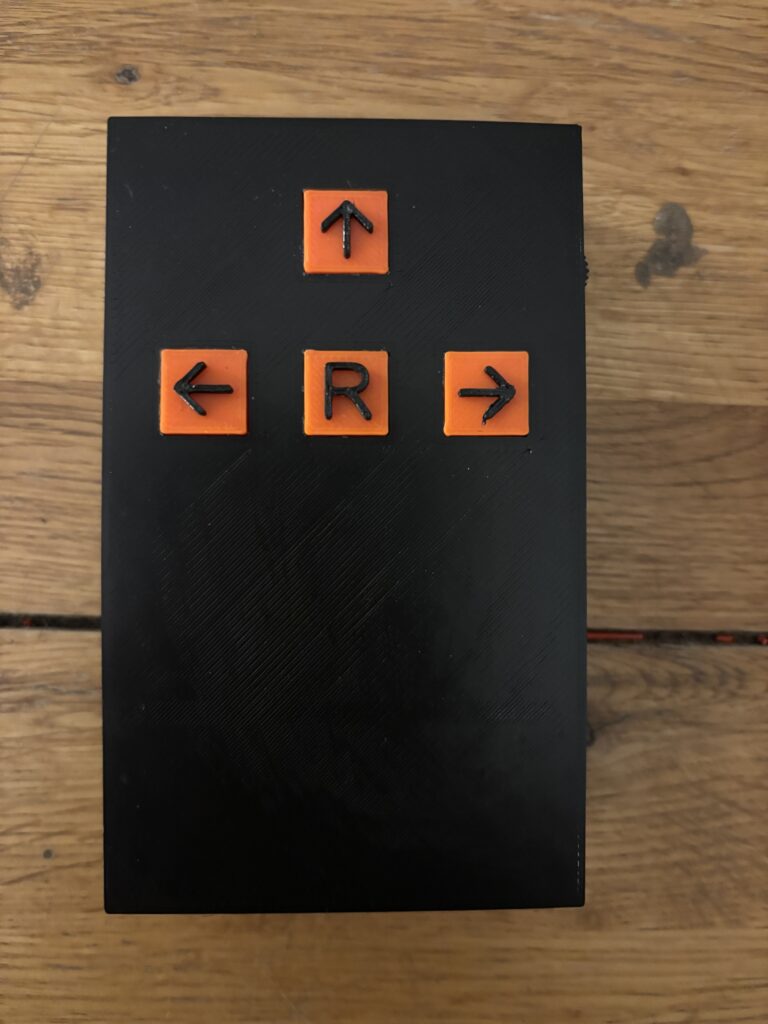
Clicking once on the Left, Up and Right arrow buttons will send a single command to the buggy which will be queued until the ‘R’ button (run sequence) is subsequently pressed. For example, pressing ↑, ↑, ← followed by the ‘R’ button would make the buggy move forwards twice (each forward movement moves the buggy 200mm) followed by a 90° left turn.
Commands are transferred from the hand-held controller to the buggy via bluetooth low energy. This was one of the most challenging aspects of the buggy build, as the details of bluetooth communications between a Raspberry Pi Pico (used in the hand-held controller) and the Arduino Uno R4 are not well documented and took quite a long time to figure out!
The initial trial was very positive and the buggy seemed to run quite accurately, making accurate forward movements and turns. But the acrylic chassis was rather flimsy and flexed with the mass of the motors and large Lipo battery. So it was decided to construct an entirely new 3D printed chassis from PLA:
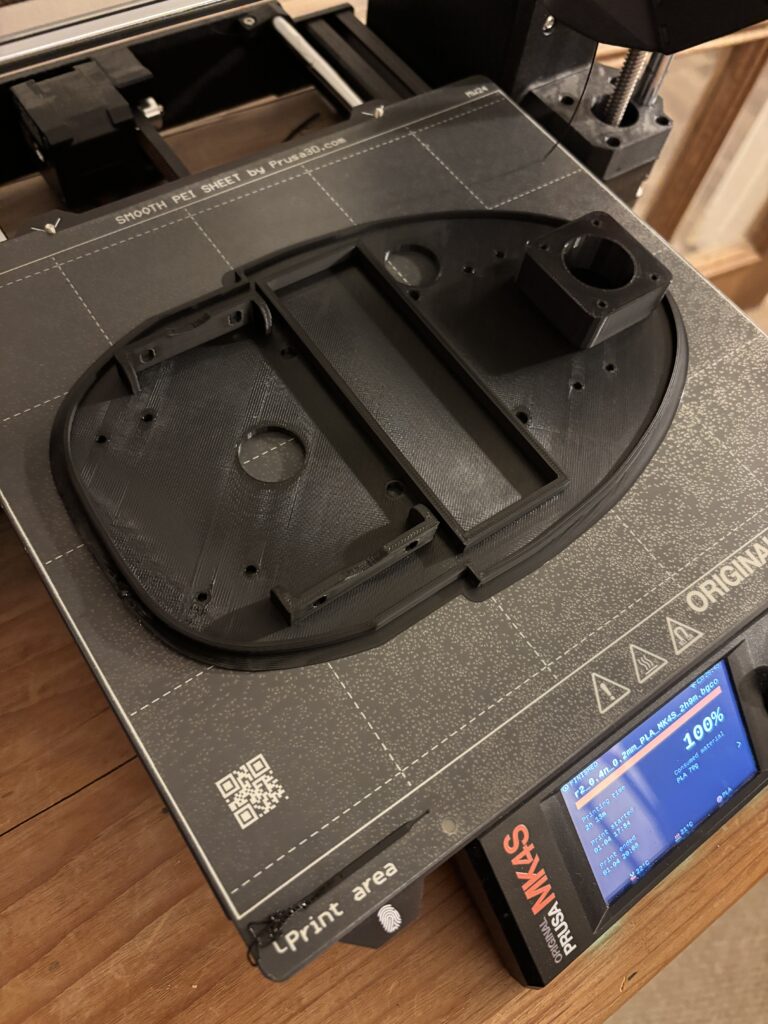
The underside of the buggy (where the stepper motors are attached) is shown above just after it had finished printing. Some additional support brackets were also needed to house the on/off switch and support the Arduino Uno:
The latest version of the buggy using the new 3D printed chassis is shown below:
The 3D print files (.stl) and code for the Arduino and Pico will be made available soon, so that you can download and build your own programmable buggy.
Below is a video demonstrating the buggy and how the controller is used to upload simple sequential programs:
Leave a Reply