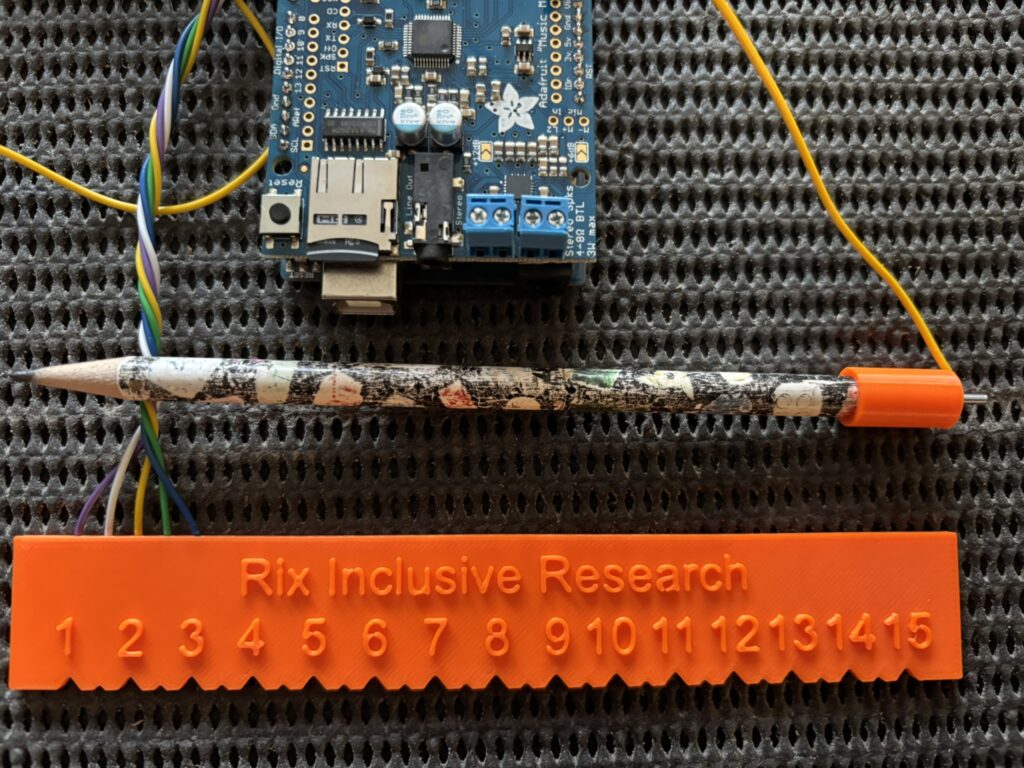
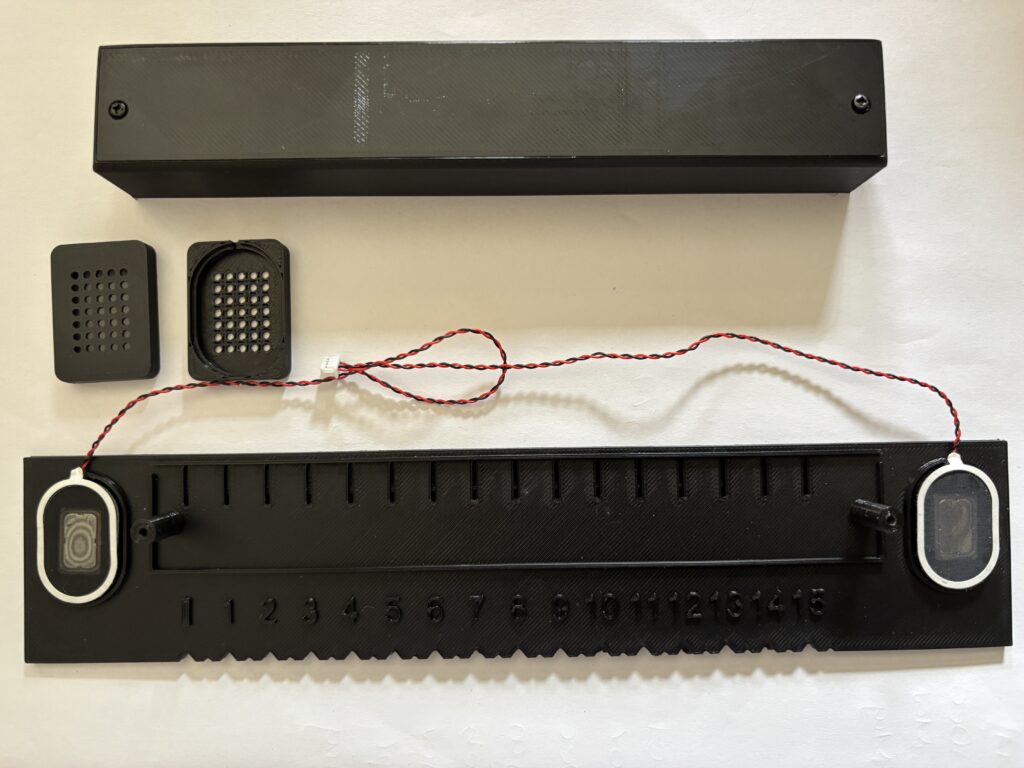
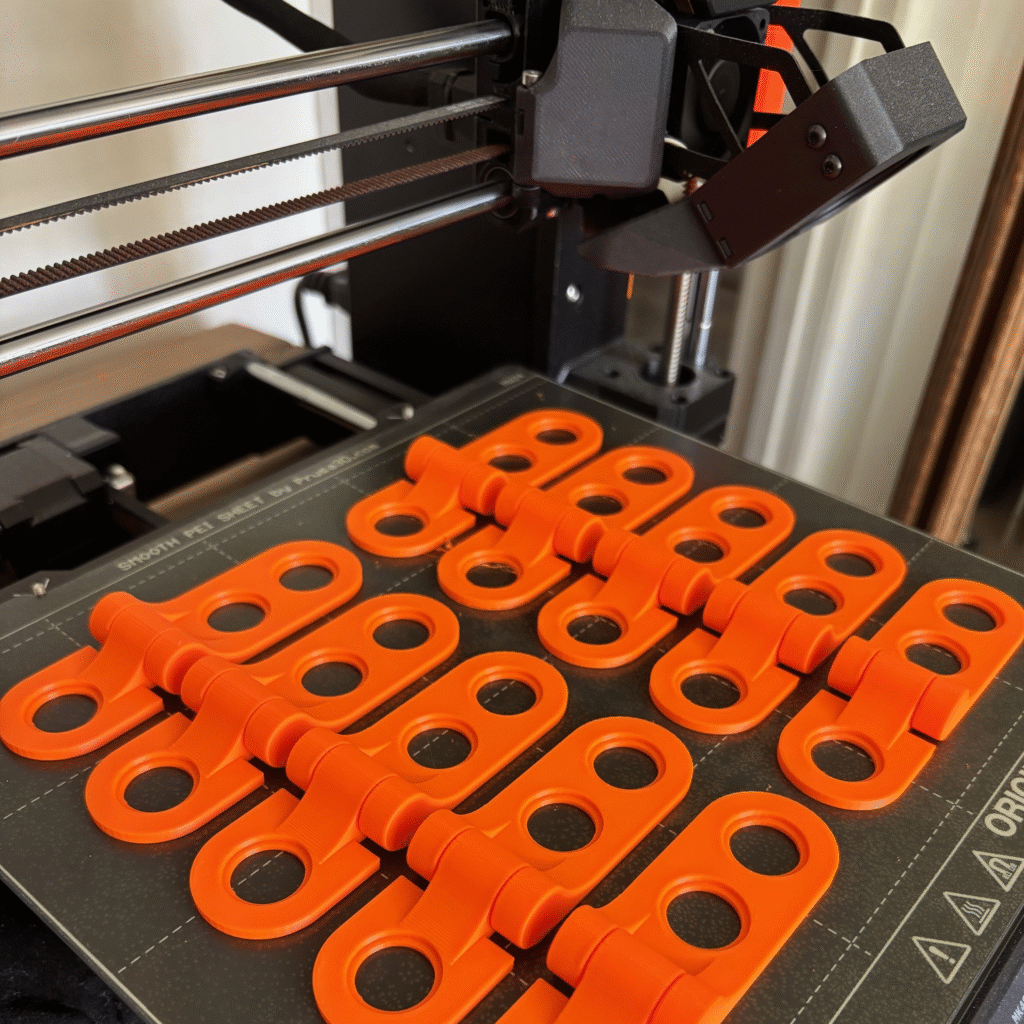
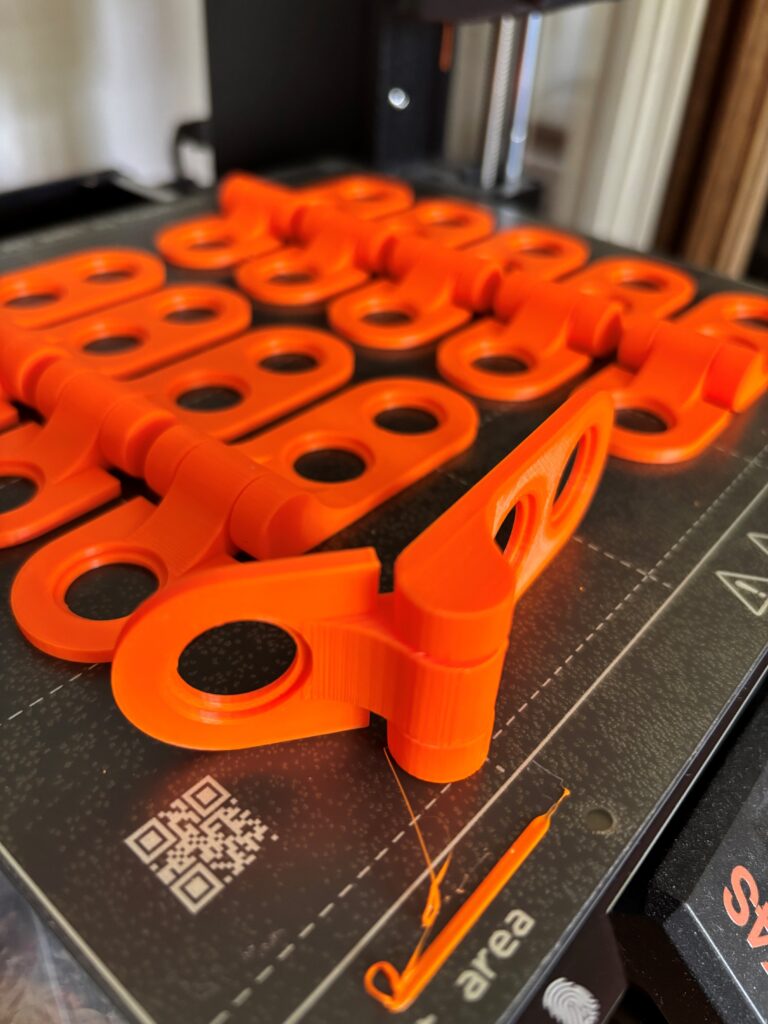
The new version (technically the next iteration, as it is far from ‘finished’) of the talking ruler is almost ready. New parts have been printed, the stripboard has been soldered together and connectors added to the various parts.
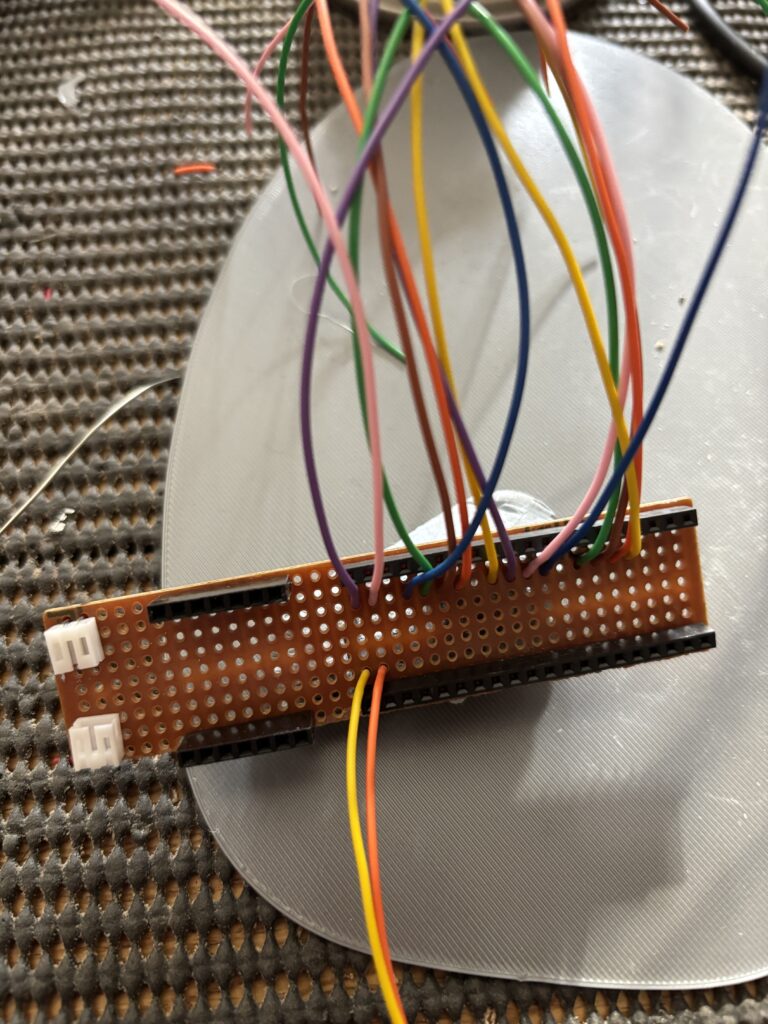
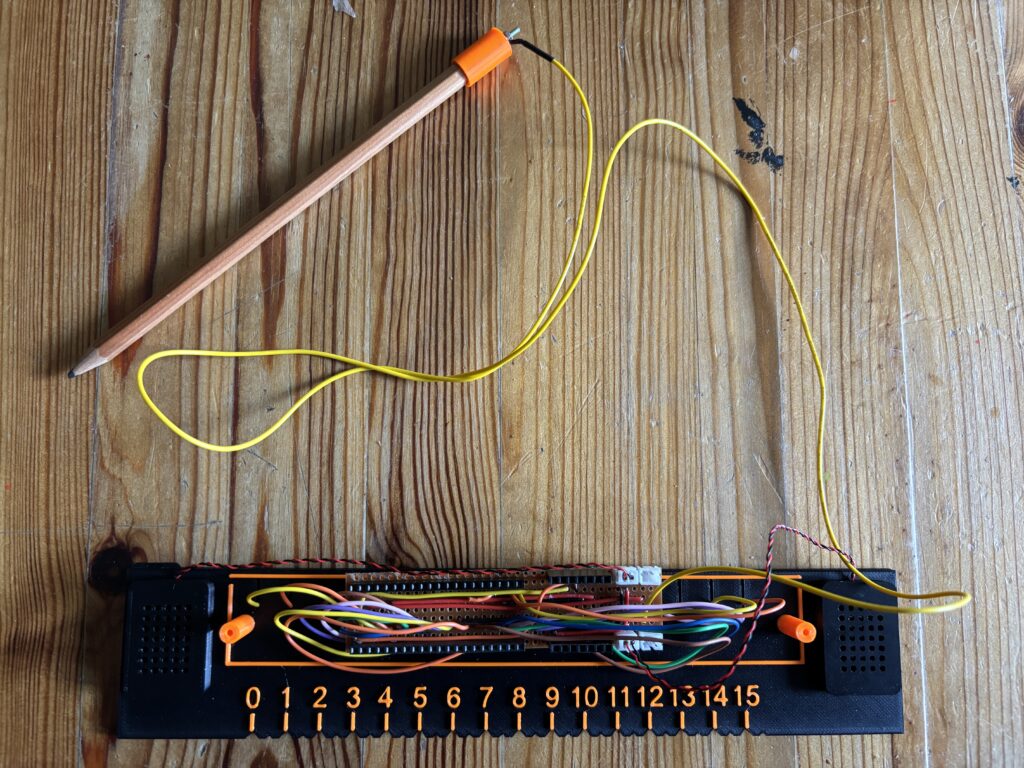
As there needs to be a wire for each of the touch points on the ruler, which is every 10mm, then it required 16 different ports on the Pico, and therefore 16 single core wires soldered onto the board:
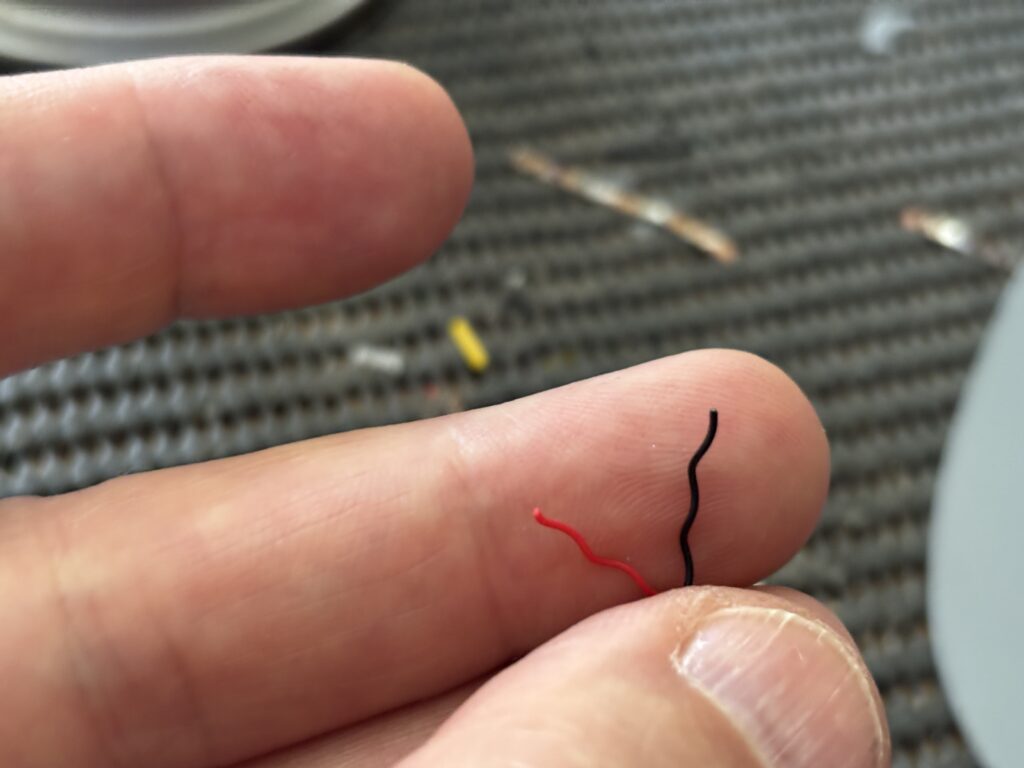
I actually removed the two connectors at the end of the board and replaced them with ones which pointed upwards, as there was not enough space to insert both plugs. I also added connectors for the speakers. It was quite a challenge adding the plugs, as the speaker wires are only about as thick as a few human hairs:
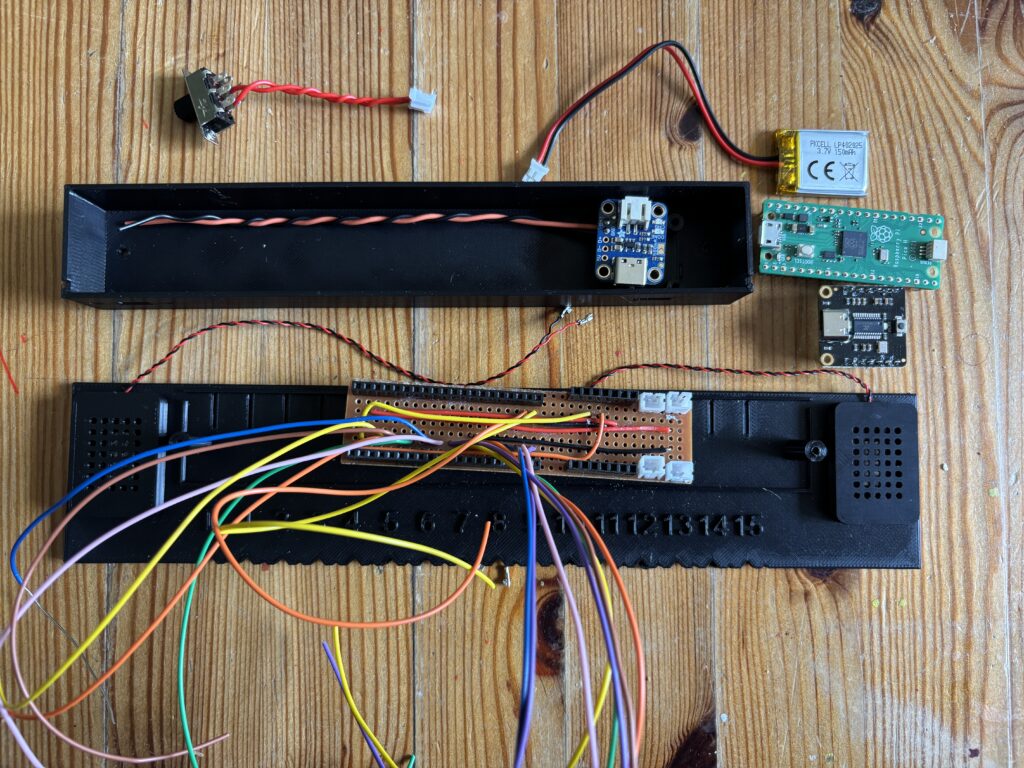
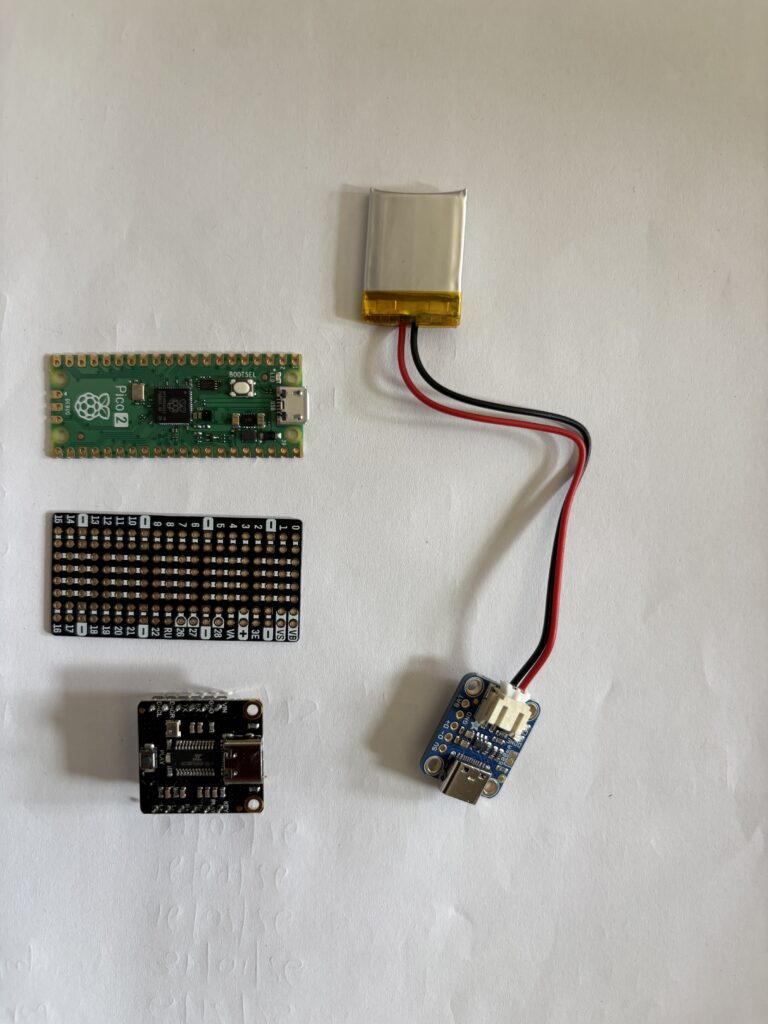
I photographed the set of components that need to go inside the housing, which you can see will be a challenge to fit – an exercise in shoe-horning:
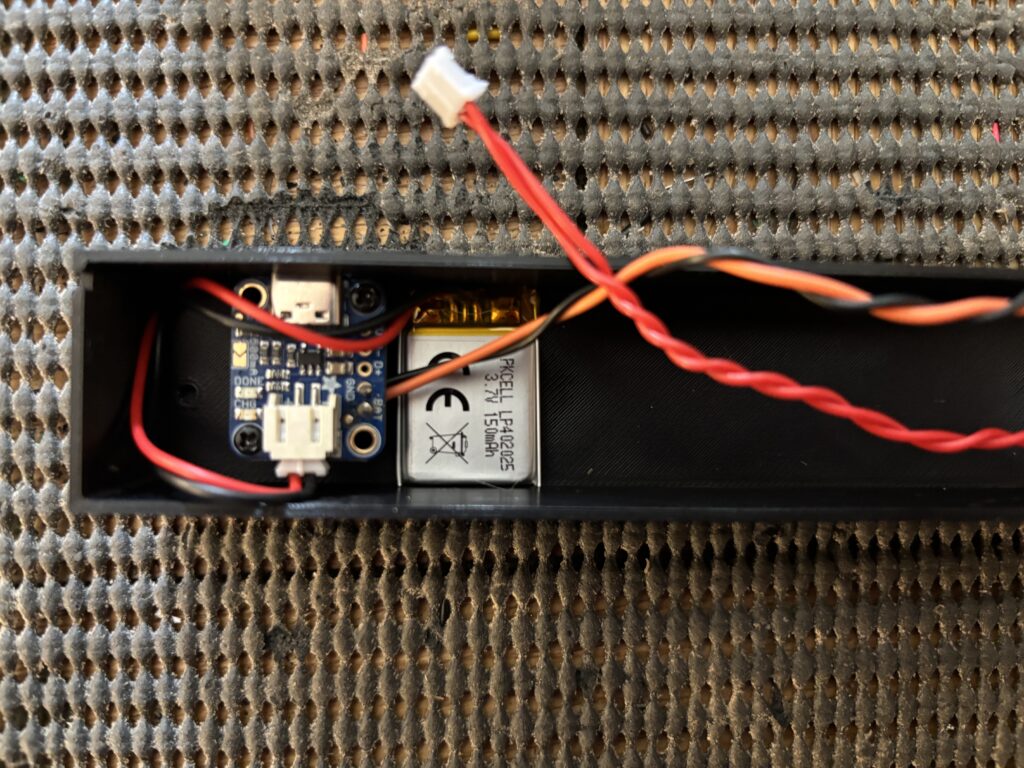
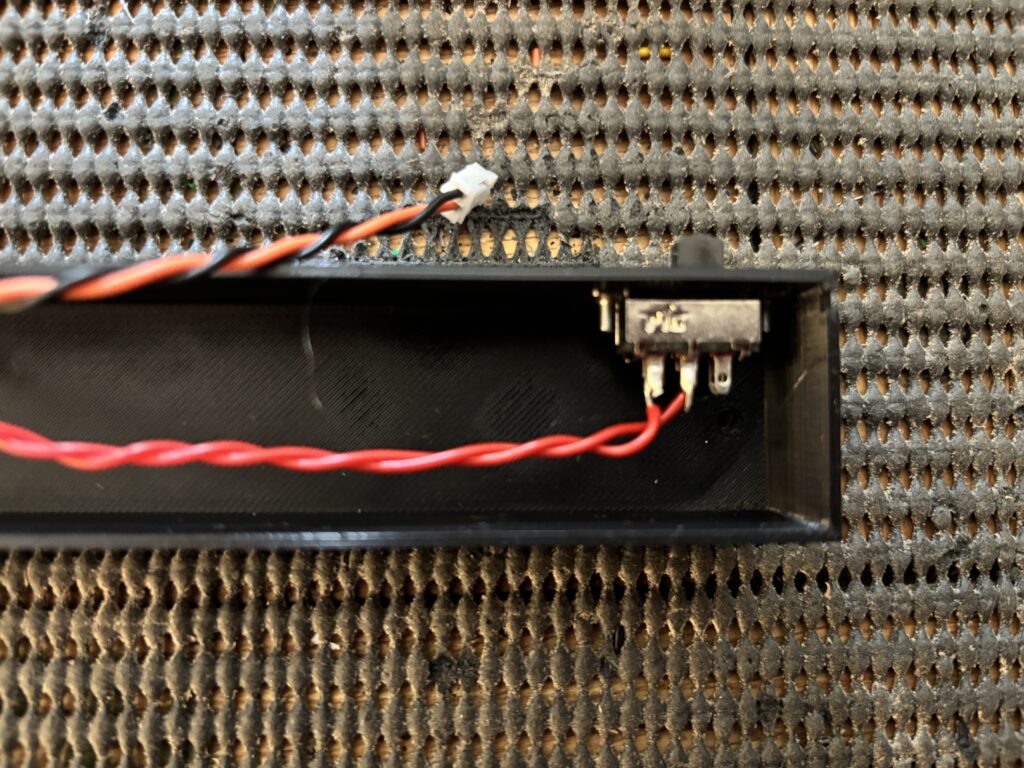
The new battery and charger unit have been added to the housing, as well as the on-off switch:
The on-off switch:
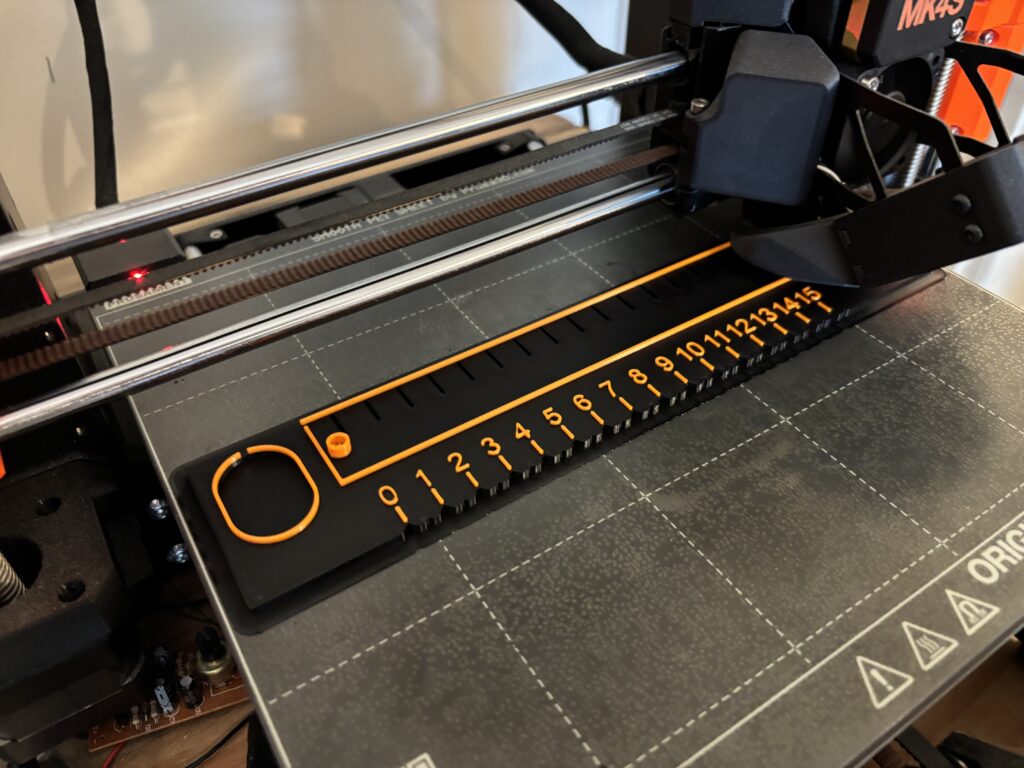
Once the new housing has finished printing, it’s time for assembly and to see if it all fits together. Note that I chose multi colour filament to make the numbers stand out:
The assembly of the talking ruler was a little tricky, given the number of wires and components that had to be crammed inside:
The working version is shown below:
You might have noticed that the playback sometimes repeats when holding the pencil onto the contact. This is a limitation of the software – the next version (if there is one) will use a different MP3 player module and be more controllable.
The next thing to do is find a collection of suitable candidates to try the ruler out and see how well it works, get feedback on possible improvements and write up. If you’d like to participate, or know of someone with a sight impairment that would like to participate, then please do contact me. The user tests will be held in East London (at UEL) and also in Norfolk UK.
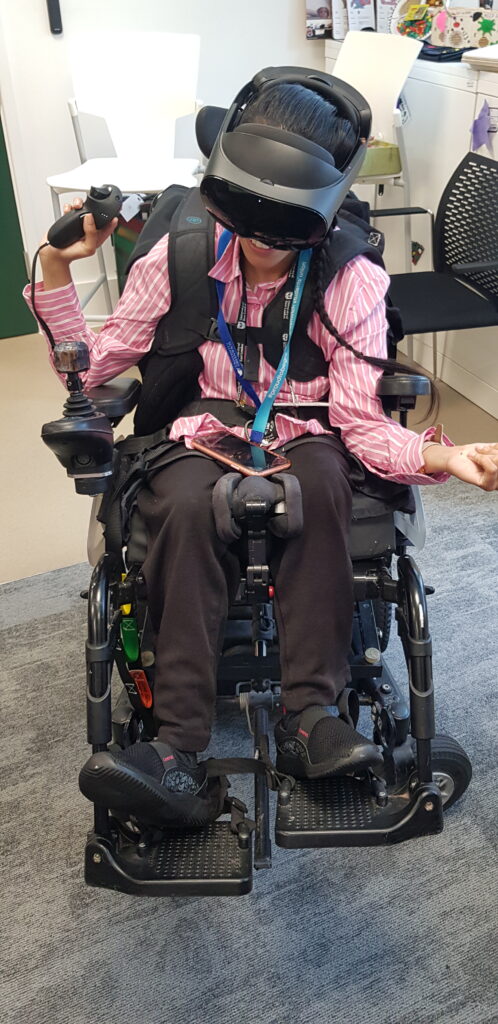
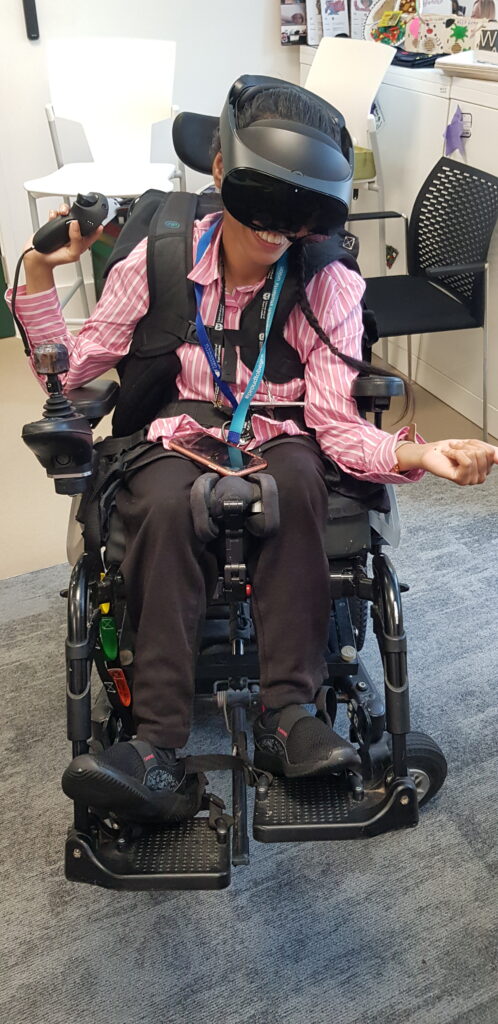
We ran our first VR workshop specifically for wheelchair users this week, giving two of our co-researchers a taste of virtual reality. You can see one of our researchers below using the Meta Quest Pro to explore one of the spaces:
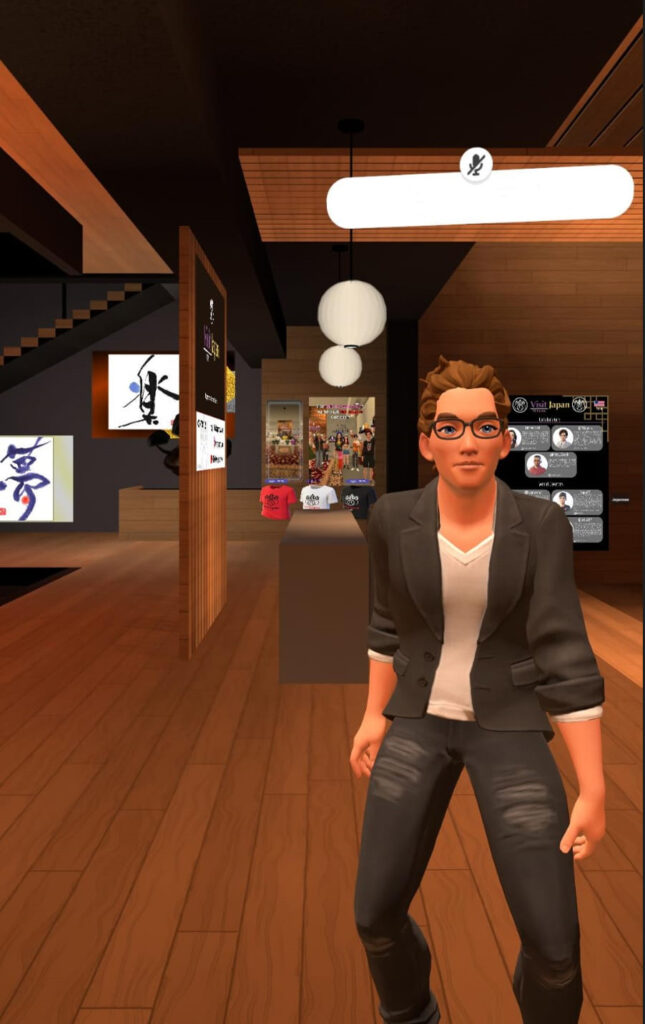
The space that she looked at originally was a simple introductory space in the meata Quest Horizon worlds:
The VR workshops are guided by multiple, overlapping goals including the exploration of virtual spaces such as environments that wheelchair users would not be able to easily accomplish in the physical world, looking at some of the issues that accompany standard controllers that are supplied with the VR headsets and exploring ways of making VR more inclusive.
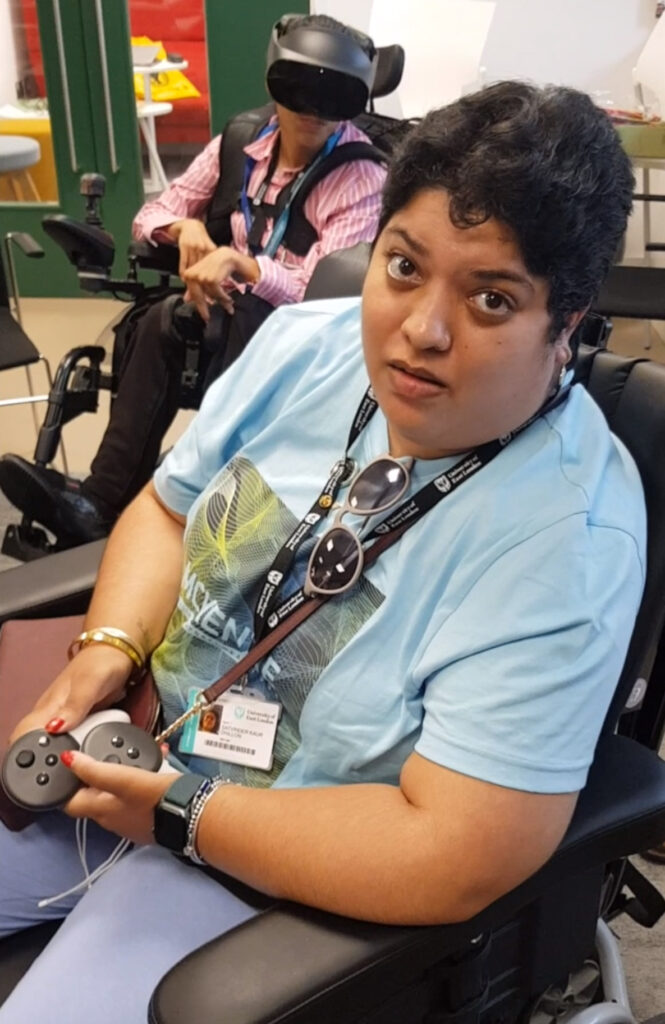
Wearing the headsets did not cause too much concern (although both are fairly heavy), as they are both adjustable and with reasonable padding. However, the controllers appeared to be difficult to hold and the buttons and joysticks hard to manipulate particularly if you have limited manual dexterity. In the video below, you can see that the controls on the VR controller need some improvement – something that we are currently working on.
After we had looked at a few of the virtual worlds (mostly from the set of Horizon worlds intstalled on the headset) we asked our researchers “If you could do anything in a virtual space, what would you choose to do?” The responses were interesting. One said she’d like to be ‘Michael Jackson’s hat for a day’ and experience what he sees on stage, and the other was a little more down to Earth, experiencing being in Kenya and possibly a VR cooking experience which she talks about in the video below:
After creating the initial prototype of the talking ruler and considering some of the early feedback given to me by people who have seen the device work, the new version is now on its way. This is now a self-contained unit that includes speakers, audio player, microcontroller and battery.
The first version of the talking ruler worked quite effectively and produced a good clear sound, but suffered from having external wires, an external microcontroller and audio player:
As the image above shows, the first version of RixTalk used an Arduino Uno R3 together with the brilliant Adafruit MP3 player shield (super audio quality). A standard HB pencil was wired to the Uno via a simple 3D printed cap, and the contact points on the ruler (that are touched by the pencil) are wired to the analog ports. It worked well, but was rather cumbersome with all the external wires and external microcontoller.
The new version of RixTalk (let’s call it RixTalk2) is self-contained, with the speakers integrated into the ruler itself, and all electronics contained within a housing that is screwed to the ruler. The new version uses digital ports on the Pico, as there were not enough analog ports available. All of the components are 3D printed using a Prusa Mk4S.
Note that the first notch on the ruler is a locater for 0 mm. The remaining notches are either large (every 10mm) or small (between each large notch). The large notches represent lengths at 10mm, 20mm, 30mm, etc., and play audio sounds for each one. The small notches are for lengths 5mm, 15mm, 25mm, etc., but do not play sounds.
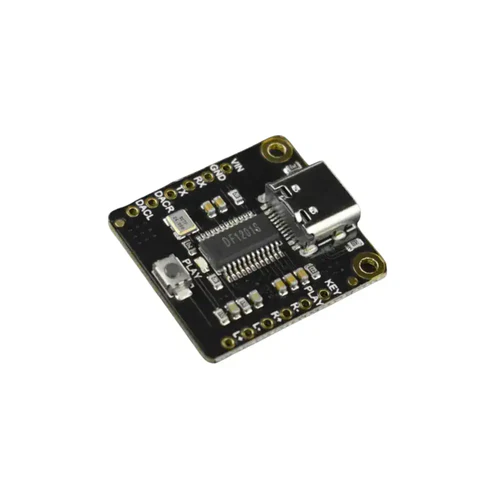
Internally, the microcontroller is a standard Raspberry Pi Pico Mk2 (i.e. not wireless), the MP3 decoding and playback is taken care of by a Fermion MP3 module, using simple AT (ATtention) commands via one of the UARTs on the Pico:
The Fermion is connected to a pair of 2W speakers that are located at either end of the ruler, and is controlled directly by the Pico. Both Pico and MP3 player are powered using a single 3.7V 150 mAh LIPO battery that is connected to an Adafruit lipo charger module:
The Pico and Fermion site side-by-side on a piece of stripboard (not the nice little Pi Hut board above – that was too small), which is used to connect everything together.
The audio was generated using an AI text to speech engine, with an English sounding female voice. Each number was generated individually and stored as an MP3 file on the Fermion player.
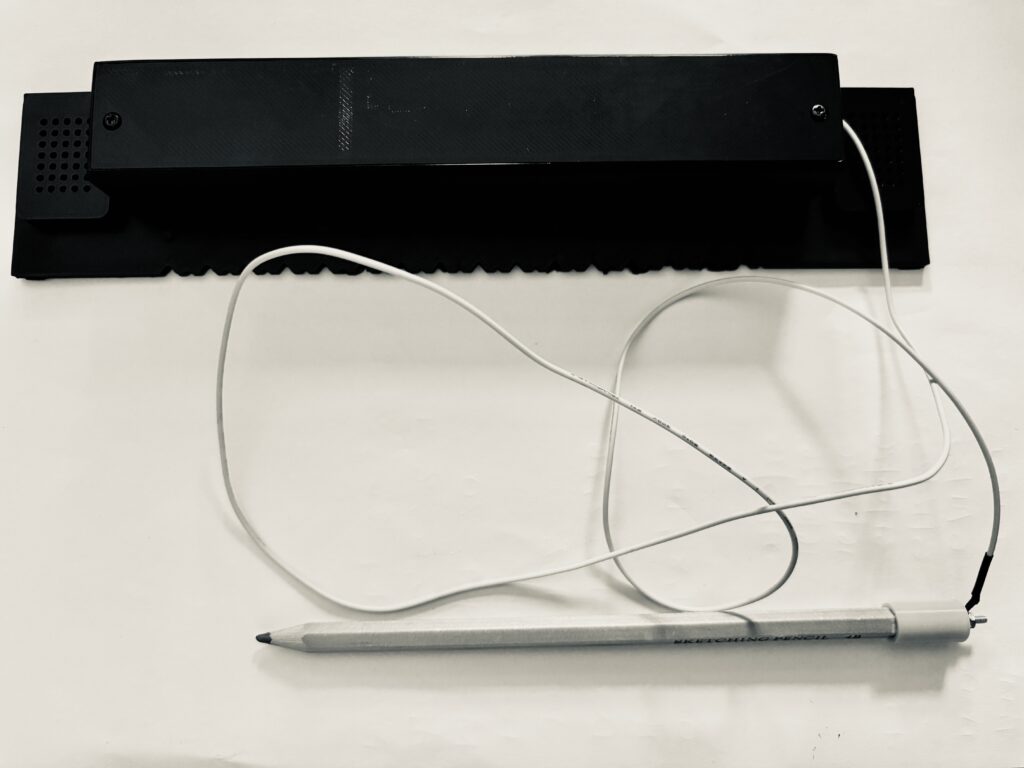
The image below shows the RixTalk talking ruler assembled, together with a 3B pencil. A 3B is being used as it gives better conductivity.
The talking ruler has yet to be tested out with end users, but that should not be too far ahead.
The next Hackathon (Hackathon25) at Rix Inclusive Research will take place on June 18th 2025, and already the planning is well underway with ideas floating around with respect to how it will run, how it will be enabled and the types of project that we are interested in considering this year. The hackathon will focus on generating ideas and solutions for projects within the very broad area of Healthy Living.
A suggestion made by one member of the Rix team (Craig) was to use ‘Makedo’ kits (https://www.make.do/) for helping in the construction of prototypes out of cardboard. These are kits aimed at children (or adults!) that provide you will tools and accessories for encouraging creativity and imaginative play using easy-to-use tools to build with cardboard. We have been lucky to have MakeDo as one of our sponsors this year, who have very kindly donated the kit to use at the Hackathon.
The kits, which consist of tools and resources for building, cutting, screwing together, etc., cardboard models, could work really well for the Hackathon, giving people the opportunity to construct something physical from simple materials, and what could be simpler that cardboard?
In addition the website has a number of additional resources, such as a 3D printable hinge which I immediately decided to print. The image below shows the hinge that was 3D printed on a Prusa MK4S. It works straight from the printer, and requires no assembly.
This worled really well, so I decided to print a few more to add to the collection. There will be more on the way for the actual Hackathon, but I an only print 10 at a time.
One of the great things about these 3D printed parts (like many 3D printed items) is that they work stright off the printer, without assembly:
NFC (Near Field Communication) Tags are tiny stickers, cards, and keychains that can store and send information to a phone when tapped. They don’t need to be charged because they get power from the phone when they come close together.
NFC tags are used for many things:
Quick Actions: Tap your phone on a Tag to turn on WiFi, open an app, or play music
Contactless Payments: Used in credit cards and Apple Pay/Google Pay to make purchases
Smart Business Cards: Tap a Tag to instantly share your contact information
Access Control: Used in keycards for doors and event passes to enter restricted areas
Home Automation: Used to turn on/off lights, adjust thermostat, control fans, etc.
How to add data to an NFC Tag:
Step 1: Purchase an NFC sticker, card, or keychain online
Step 2: Download an NFC app (e.g. NFC Tools)
Step 3: Choose what you want the Tag to do (share contact details, turn on WiFi, send message, etc.)
Step 4: Write the data to the Tag – Hold your phone close to the Tag, press “Write” and the phone will save the info onto the Tag
Step 5: Test it – Tap your phone on the Tag to see if it works
Finally, I managed to find some spare time today to connect up the audio system to a Raspberry Pi 4, which includes a simple speaker output and MAX9814 condenser mic input module. The purpose of this setup is to allow the voice recognition software (VOSK) to be installed on the Raspberry Pi, and respond to simple prompts. It took a huge amount of tweaking (and a lot of head scratching, cups of tea and chocolate) to finally resolve all the conflicts, but it seems to work, and the great thing about it is that it works offline.
The screenshot below shows a simple test that illustrates the software responding to voice prompts after I spoke several simple commands into the microphone:
I was impressed that the mic module would pick up on commands from 2 metres away, and did not make any mistakes.
The next stage of this work will be to attach the motor controller to the Raspberry Pi and install the whole module into the RixBot body. The body of the RixBot is based upon a RealRobots ‘Cybot’ body, which was originally sold as a kit through a weekly publication (see below). This is an excellent basis for a robot, as it already has geared motors, battery compartments and places for light and ultrasonic snesors built into it.
Once the Raspberry Pi has been mounted inside the robot body, and the motor controller installed, then it is ready for testing at Rix with our co-researchers.
This is the second Generative AI workshop that we have hosted aimed at finding out more about the accessibility and usability of Generative AI software. The workshop developed ideas that were explored during our first workshop, presented as part of ‘Creative inclusive research explorations of intelligent technologies/Artificial Intelligence (AI) at the University of Ravensbourne MeCCSA Symposium’
At the Symposium, delegates were working in diverse inclusive teams and given the chance to try out different AI software engines such as Stable Diffusion, in this instance hosted by NightCafé. In order for participants to have the chance of experiencing AI software, we gave no specific goal and requested people to experiment and enjoy using their imagination to see what could be created. For this second workshop, our co-researchers were given the task of generating images for a specific theme – health and wellbeing.
Our co-researchers were all very keen and excited to learn and work with AI and see what they could create for themselves. We worked in teams of people with and without a learning difference and disability (LDD) Along with gaining a better understanding of the inclusivity of AI software, a related focus was of a future where AI has a prominent role, and that our diverse team should be included in the development of this AI. Our workshop discussions started to showcase the potential advantages for use by people with LLD, and this is particularly relevant in light of the conversations regarding the ethics of AI and access to the services that it provides.
The participants at the workshop session were given the theme of Health and Wellbeing as we age, with the specific focus on healthy food, exercise and maintaining good mental health. They were asked to try and capture these three threads by generating images (including cartoon sequences) using the AI software and by providing the prompts, either through speech, text or by uploading a sketch they had drawn.
One of the images representing health and wellbeing generated by Nightcafe AI engine
Being able to talk to the AI seemed to work well for some who found it difficult to type, although some found that the dictation software (built into the Macbook) misunderstood what they wanted to say, possibly because the speech was not clear enough. Some of this was possibly due to the unique formation of sentences they spoke which could perhaps be improved upon with the use of an AI transcriber that could learn the idiosyncrasies of the speaker and transcribe their intentions more accurately. We haven’t yet found such software, so there is potential for a project that addresses this issue.
We discussed how AI could aid inclusion in many ways, including translating ideas, editing first thoughts, and create imagery to help share ideas and emotions. As an augmentation tool, the generative AI software engines are relevant in many areas, particularly in ideation and despite AI mis-understanding prompts, creating odd versions of reality, or just lacking something original. But no-doubt that as the software (and hardware) improves, so too will the abilities of the software to pre-empt what we really wanted to do and offer its own solutions.
The almost conversational approach with the AI was highlighted by one co-researcher when seeing the images produced by the AI software to create images showing healthy food, commented that the portions were huge – as illustrated below.
Another member of the team suggested you we need to provide clear prompts for the AI software – instructing it to create an image with smaller portion sizes. This was a common theme with the software – whichever method is used to generate the images – voice, text or image upload – you need to be quite clear and detailed about what it is that you require. Misunderstood words or keywords out of context could result in strange images being generated.
Everyone seemed delighted with the image results produced from interacting with the AI, despite some of the unusual and often unintentional consequences of the AI software, such as missing or additional limbs, or odd shaped physical objects (e.g. the dumbbells below).
Keeping prompts simple and clear seemed to create straightforward, if not a little ordinary, images. Even when providing an obscure prompt such as “Generates an image of not eating pizza, but eating, healthy and small portions with lots of vegetables” produced something realistic, though not particularly out of the ordinary.
Some of the participants attempted to generate cartoon strips to illustrate health and wellbeing, but this did require quite a lot of effort and unless very clear and detailed instructions were provided, the results were rather simplistic, as illustrated below. As with many of the other images generated, these tended to be in the form of white, physically fit, young people. To be really inclusive and include images of people with disabilities, you would need to specifically ask for this.
It was later suggested in a discussion following the workshop that visual prompts, such as physical or digital flashcards, could assist in giving the participants the cues that they were looking for in generating the images that they wanted to produce. To a small extent, some iconic prompts (image thumbnails) were provided by the Nightcafe interface for selecting the styles of image that could be generated.
At a recent visit to the Google Accessibility Discovery Centre with colleagues from Rix Inclusive Research, amongst the many accessible items on display we saw a ruler that is available for people with sight impairments (they called it a ‘Braille Ruler’). The RNIB also sell an identical ruler to the one we saw at Google, but they call it a ‘tactile ruler’. Both have cutaways every 5mm to help you make measurements, and raised numbers and lines at intervals of 5mm. Here is the one from the Google Accessibility Centre:
Not being content with a static ruler, I thought it might be interesting to enhance this a little and add some speech to the ruler. So I created an alternative version. The prototype below is the work in progress, which combines the tactile ruler with speech output using (for the prototype at least) an Arduino Uno, with an Adafruit MP3 player for the speech output:
The RixTalk Ruler has similar notches every 5mm, but larger notches every 10mm to help distinguish between them. The ruler is also only 15cm long, as it was easier to print the prototypes this way (having to produce many versions before I got the dimensions correct). Inside each ‘V’ slot is a contact wire, each of which connects to an analog port on an Arduino Uno. The contact wires are visible in the side view below:
The pencil (shown above) has a 3D printed cap that makes contact with the graphite core of the pencil, and is connected to the 5V port of the Arduino Uno. When a slot in the ruler is touched using the pencil, it makes contact with the Uno and speaks the measurement through the MP3 player and speaker. The prototype uses wires to the Arduino (just five of the thirty slots for testing purposes), which is a bit awkward, but necessary to test the idea out. However, it could be made into a single unit, battery operated with an integral speaker and bluetooth connection to the pencil. That will be the next development if we decide to continue with it.
Video of the prototype is below:
The next stage of development is to embed the electronics inside the ruler itself, with an integrated battery and speaker, and remove the need for wires by using a bluetooth connection to the pencil. We have also looked at the prospect of adding a thin base to the ruler so that in addition to having the slots at 5mm interval, you can also ruler straight lines. I’ll add an image of the new version as soon as it’s printed.
The 3D printer that I originally bought around 2014 was a Prusa i3 MK2. I chose the self build, as I wanted to know how the printer was constructed, and the instruction provided by Prusa are superb. The MK2 was upgraded to a MK2.5 and then a MK2.5S. However, it recently began throwing up all sorts of errors, including MINTEMPs and thermal runaways. I figured that it could be a number of sensor errors, but when inspecting it, and moving it to the workbench, I managed to break some of the plastic parts. This was probably due to the age of the machine (though could have be partially down to my clumsy handling).
As I have had it for about 10 years, and still need to do quite a bit of 3D printing at home, I decided to buy a new MK4S so that I could continue with my 3D printed projects (and also reprint the plastic parts for the MK2.5S). The MK4S is a huge upgrade from the MK2.5S and has some extremely nice facilities, including network capability.
With the MK4S up and running, I thought it would be nice to overhaul the MK2S and get it back to a serviceable condition (more print time). So, I stripped it down and cleaned the frame and hardware. I also printed new plastic parts for it using the MK4S. Here it is in its current state:
The plastic parts printed really well, but I’m not happy with the bearings (which are the old ones after I upgraded to a MK2.5). So I have ordered a new set this week and will replace all of them.
I’m about 1/2 way through the rebuild now, and it is coming along well, and everything appears to be fitting together as it should. The frame structure is now together, with new bearings for the Y-axis. There were some issues getting the frame square and level, and it required a lot of adjustment before it allowed the carriage to move smoothly:
The Z axis has also been installed with the bars for the X carriage, and now it just needs mounting on the base. Once this is completed, then the extruder and wiring can be installed:
My MKIIS was finished just before Christmas 2024, after re-printing all the plastic parts (on my MK4S) replacing the bearings and belts, bed sensor, PINDA, hot end sensor and print plate. When it was first (re)assembled, the self-diagnostic reported that the frame was spot on – it has never done that before (it was always just slightly out of alignment). It runs smoother than before, but still has a slight issue with stringing the filament, which I am working on. I even upgraded the filament support to a MK3/4 version – sp much easier to use, and includes a filament guide.
(The bass on the left is my vintage Kramer DMZ4001 which I have had from new, having bought it in 1982. It has been modified, replacing the pickups with schaller split neck pickup and adding a schaller bridge pickup. It weighs a ton.)